Looking for a new protective style to express your personality and promote length retention? Dookie braids are a great style to try.
If you're a beginner and need step-by-step instructions, this article is for you.
In it, we’ll tell you absolutely everything you need to know to get the look in the comfort of your own home. Let’s get right into it!
Table of Contents
Get Your Supplies
Before you start the styling process, you’ll have to do a little shopping. Here are all the supplies you’ll need to get your hands on:
- Rat-tail comb
- Wide-tooth comb
- Blow dryer (optional)
- Grease or oil for your scalp
- Moisturizer for your hair
- Shampoo
- Conditioner
- A heat source like a microwave or oven
- A pot or microwave-safe bowl
- Leave-in conditioner
- Oil
- Moisturizing cream
- Edge Control
- Edge Brush
- Braiding hair (optional) - Most people who try dookie braids use braiding hair to thicken the braids and add length. But if you have a lot of hair and don’t want your braids to be super long, you don’t need to buy braiding hair. If you do decide to get some, be sure to get the right kind - kanekalon works well with textured hair for dookie braids.

Step-by-Step Instructions for Dookie Braids Hairstyles
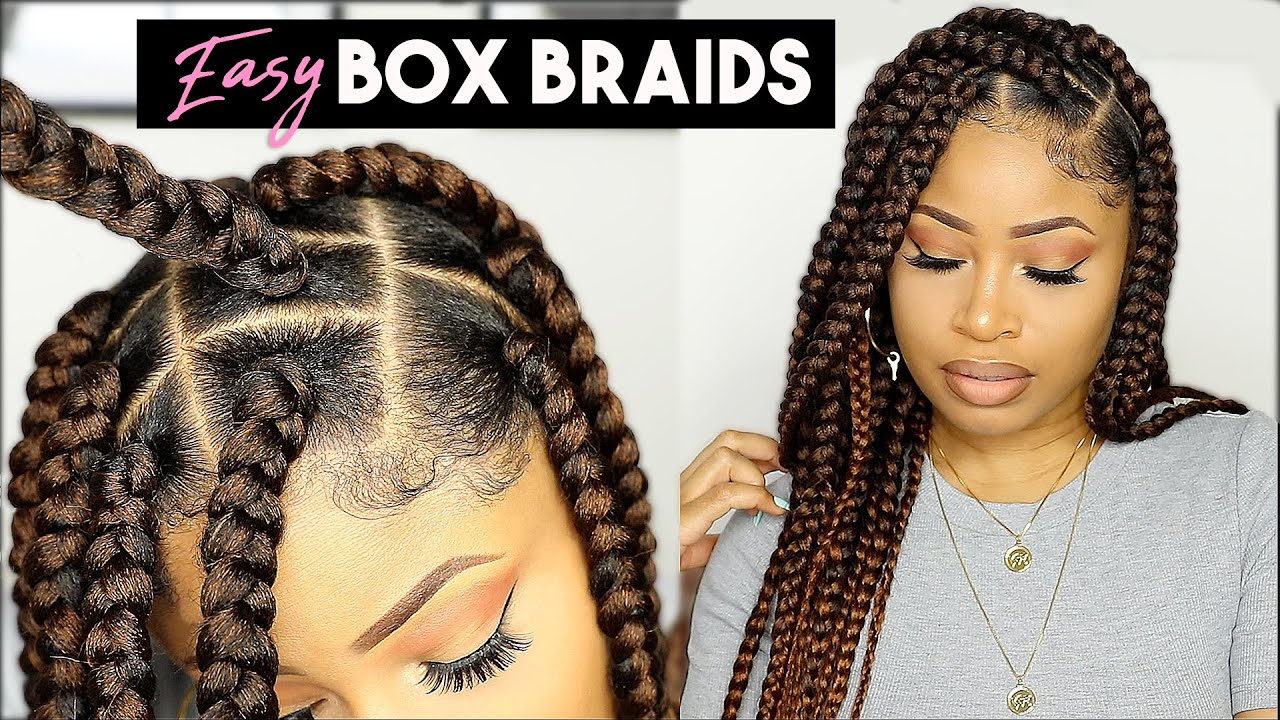
In case you weren’t aware, dookie braids are nothing more than jumbo box braids. So, if you know how to do box braids, you're ahead of the rest.
But if you don’t, that’s okay. We’ll give you all the information you need to do your dookie braids from start to finish.
Dookie Braided Hairstyles for Females
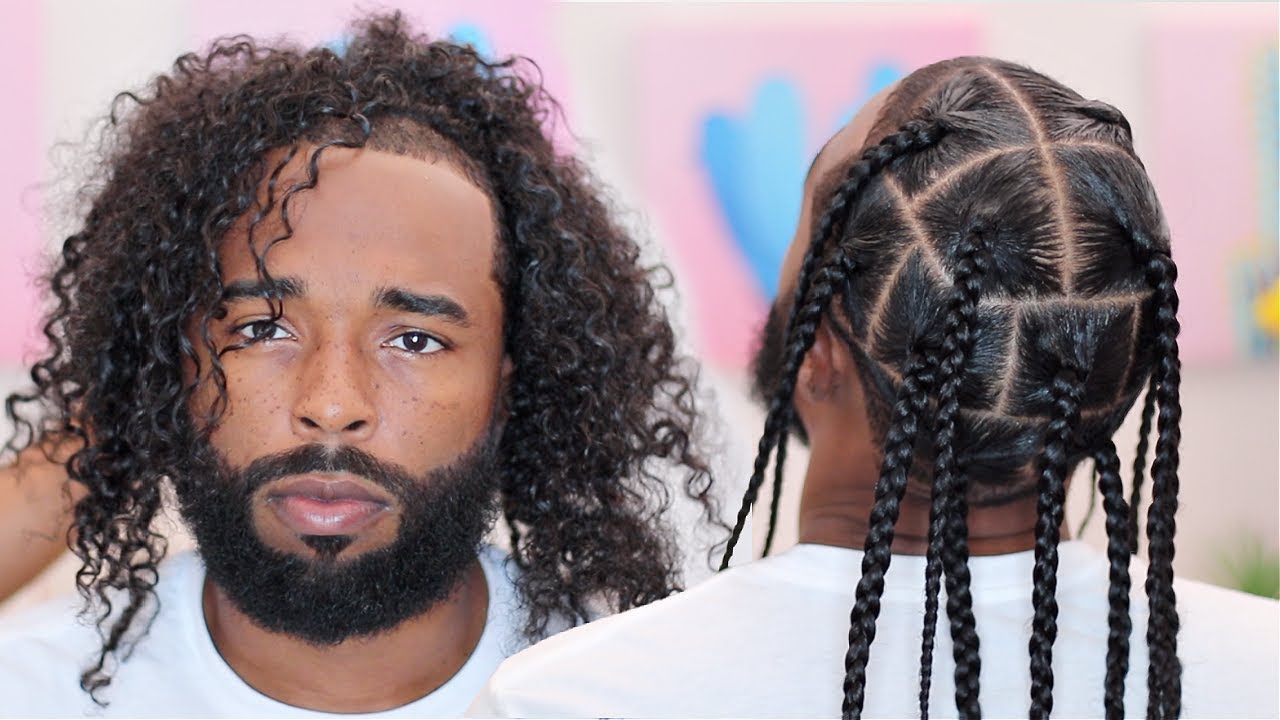
Dookie Braided Hairstyles for Males
Wash and Condition Your Hair
The first step is to wash your hair. Doing so will eliminate any excess product, product buildup, dirt, debris, or dead skin cells on your hair or scalp. Leaving all that gunk in your hair will not only lead to an itchy scalp, but it will also result in dusty-looking braids.
So, take the time to wash your hair well.
If there’s visible buildup on your hair or scalp, don’t use your regular shampoo. Switch to a clarifying shampoo - it will provide you with a much deeper clean than your normal one can.
It’s got heavy-duty cleansers capable of lifting away virtually whatever it comes in contact with. For the best results, wet your hair, apply the shampoo, scrub your scalp with the pads of your fingers, and then rinse.
You can repeat the process if you’d like, but it’s not mandatory.
Never forget to condition or deep condition your hair after washing. Any time you wash your hair, some of your hair’s moisture will be washed away. You need to replenish that moisture to ensure that your hair remains manageable and healthy.
While your hair is coated in conditioner or deep conditioner, it's the perfect time to detangle. Run your wide-toothed comb through your hair in sections.
When detangling any one area, start at the ends and then work your way up to the roots. Once your hair is tangle-free, move on to the next step.

Hydrate Your Hair
Your hair will be tucked away in the braids for several weeks. So, you should take some time to hydrate your hair before braiding it up.
If you’re unsure how to do that, all you need to do is apply a spray leave-in or an oil of your choice and then finish things off with your favorite moisturizing cream. For most, this will be enough to keep your hair hydrated for the duration of the style.
Part Your Hair Into Large Sections
Your hair is clean, moisturized, and detangled. Now, it’s time to get to parting. Recall that dookie braids are very large, so your parts should be large.
It’s never a good idea to have massive braids with small parts; the weight of the braid will pull down on your roots and increase the chances of breakage. So, when parting your hair, err on the side of too big rather than too small.

Braid Each Section From Roots to Ends
Choose a section of hair and apply a generous amount of edge control to the roots. Smooth the hair with your fingers or an edge brush to minimize flyaways.
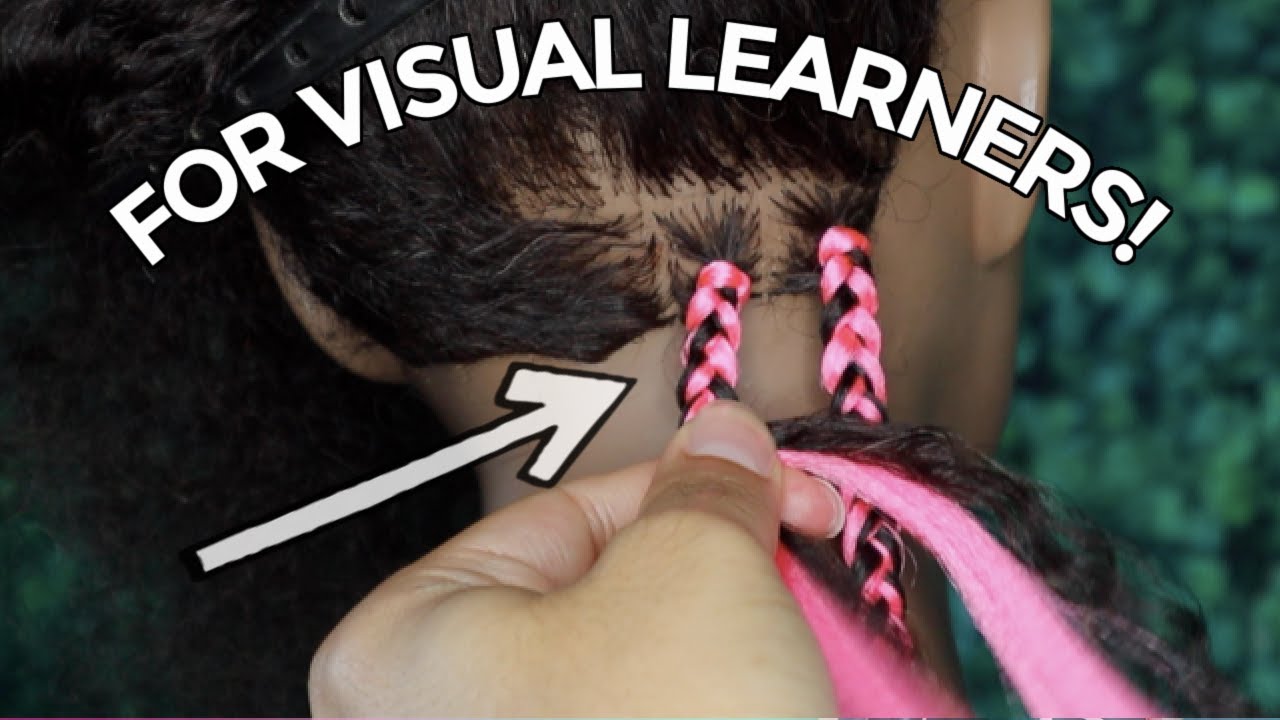
And then, braid the braiding hair in with your natural hair from roots to ends.
If you don’t know how to do so, we recommend you watch some videos to learn how to do it. Learning to braid is very much a visual process.
No matter which method you choose, braid with tension.
And by this, we mean that you should hold your hair taut as you cross one section over another. Doing so will limit the frizz you see in the coming days and weeks.
Also, you should braid all the way down to the ends. Traditional dookie braids rarely have loose ends.
Repeat this step on the rest of the sections until all your natural hair is braided.

Seal the Ends of the Braids
Once your hair is braided up, seal the ends. Unraveling braids are a real pain. The most reliable way to seal your braids is the dip method. It requires you to dip your braids in super-hot water to freeze the hair into formation.
Just know that not all hair types can be dip sealed - check with the manufacturer of your braiding hair before you start.
Here are the steps to follow for dip sealing your braids.
- Heat some water on the stove or in the microwave. The water should be so hot that it boils.
- Put a towel around your neck to prevent burns.
- Have someone else dip the ends of your braids in the water. They should dip them a few at a time and swirl each bunch around in the water for a few seconds for a reliable seal.
- They should pull the braids out and squeeze them dry with a towel.
Then, style your edges with edge control and a toothbrush or edges brush.
It’ll make your braids look a little more polished. But don’t go overboard with it; since your braids are large, using too much baby hair for your edges can create unnecessary frizz.
Finish things up by cutting away any stray hairs from the ends of your braids.
This is another optional step that makes your braids look a little neater. You can use whatever scissors you have lying around for this step.

Dos and Don’ts of Dookie Braids
Here are some helpful dos and don’ts to help you get the best possible results. They’ll be especially helpful if you’re a beginner and have never braided your own hair before.
Dos
- Do braid with tension to reduce flyaways.
- Do take your time - neatness over speed.
- Do cover your hair up at night with a silk or satin scarf to prolong the style’s longevity.
- Do use edge control on your roots before braiding each section if you want the braids to be neat.
Don’ts
- Don’t make your parts too small.
- Don’t buy extension hair without verifying whether it can be hot water sealed.
- Don’t braid your hair too tightly at the roots - doing so can result in hair loss via traction alopecia.
So, there you have it - everything you need to know about how to do dookie braids on yourself or even someone else. As you can see, it's a pretty involved process.
But with some time and effort, you can achieve clean, sleek dookie braids yourself at home. Just follow the above instructions closely. We hope this information was helpful, and we wish you the best with your hairstyle transformation.


