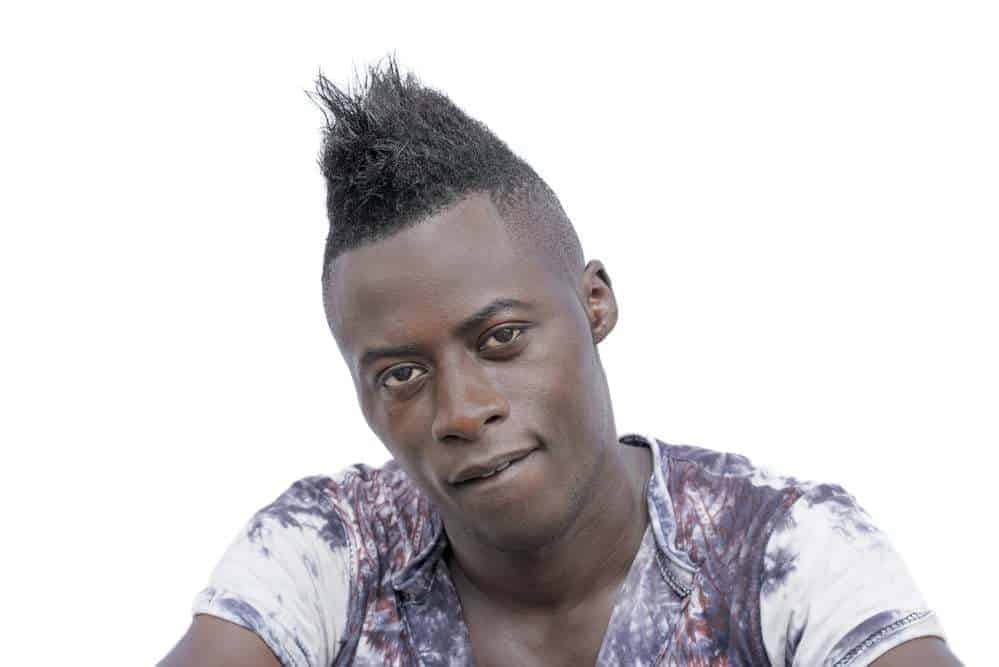
Beautiful doesn’t even begin to describe the classic frohawk, which is a curly rendition of the traditional mohawk. It’s a hairstyle that features slicked down or braided sides and a curly strip of hair down the middle of the head.
Whether you’re new to Frohawks or you’ve struggled with the style in the past, this article is for you. We’ll share with you detailed instructions for how to create a bomb frohawk.
Table of Contents
- 1 What Is a Frohawk?
- 2 How to Create a Frohawk
- 3 Do Your Frohawk
- 4 Variations on Frohawks
- 5 Maintenance for Frohawks
- 6 How Long Frohawks Last
- 7 Are Frohawks Protective?
- 8 Pros and Cons of Frohawks
- 9 Frohawk Dos and Don’ts
- 10 The History of the Frohawk Hairstyle
- 11 Frohawk & Mohawk Hairstyle Photos
- 12 1. Frohawk Fade for Men
- 13 2. Big Curls with Shaved Sides
- 14 3. Frohawk Fade with Sideburns
- 15
- 16 4. Blonde Mohawk on Straight Hair
- 17 5. Side Braided Mohawk on Straight Hair
- 18 The History of the Mohawk Hairstyle
- 19 Ongoing Styling And Maintenance
- 20 Should You Try the Frohawk Style?
What Is a Frohawk?
A frohawk is a curly updo or afro styled to look similar to a mohawk with a centralized section of hair that runs from the forehead down to the nape.
A mohawk is a central, narrow strip of upright hair that runs from the forehead down to the nape, with the sides of the head generally bald or shaved close to the head. Hence, the frohawk and mohawk hairstyles are very similar.
The term mohawk is also applied much more loosely to similar hairstyles, many of which have informal names, including the deathhawk, liberty spikes, frohawk, psychobilly mohawk, and Chelsea hawk.
How to Create a Frohawk
The first step in any styling session is to gather your tools and supplies. To create this style, you may need the following items:
- Shampoo
- Conditioner
- Deep-conditioner (for super-dry hair)
- Moisturizer
- Styling gel
- Edge control
- Wide-toothed comb
- Pick
- Rat tailed comb (for ponyhawk)
- Boar-bristle brush
- Rubber bands
- Bobby pins
- Toothbrush
- Spray bottle with water
Note: You will not need all of these supplies. Some of them are for specific variations of the frohawk style.
Prepare Your Natural Hair
Natural hair prep is essential for healthy hair and a problem-free styling experience. We encourage you to closely read the following sections to adequately prepare your hair for the style.
Shampoo
Starting with dirty hair can make the styling process difficult and reduce your frohawk’s longevity. Shampooing your hair will remove dirt, debris, and other impurities that make your hair unmanageable and hard to moisturize.
Use a sulfate-free shampoo to cleanse your hair thoroughly. Here are a couple of great shampoo options for a deep yet gentle cleanse:
Condition
Curly strands need moisture, and the conditioning step is the prime time for hair hydration. Use a moisturizing conditioner with oils and butter to take your hair from parched to supple.
We recommend staying away from conditioners with tons of synthetic ingredients.
Here are two moisturizing conditioners to consider:
While your hair is coated with the conditioner, use the wide-toothed comb to detangle your hair. This will cut down on shedding and breakage during the styling process.
Deep Condition
Deep conditioning is an optional step, but curly girls with super-dry hair shouldn’t skip it. The longer your hair is chronically dry, the higher the risk of hair damage.
So, if necessary, apply your favorite deep conditioner all over your hair and comb it through with a wide-toothed comb.
Moisturize
While conditioning imparts moisture to the hair, conditioning/deep conditioning is not enough to keep your hair moisturized in-between washes. Immediately after washing and conditioning your hair, it’s time to apply your moisturizer.
You may already have a moisturizer that you like, but if you don’t, you can try TGIN Sweet Honey Hair Milk or Alikay Naturals Shea Yogurt Moisturizer.
Regardless of the moisturizer you use, make sure that you apply it to all of your strands and comb it through for even distribution. Also, being that the ends are the oldest part of your hair, focus the moisturizer mainly on the ends.
Do Your Frohawk
Now that your hair is shampooed, conditioned, and moisturized, it’s time to get to the fun part...doing your frohawk!
*The following instructions are for a basic frohawk with bobby pins. Instructions for frohawk variations are further down in the article.
Define Your Curls (Optional)
If you want your frohawk to be defined, you can take a couple of minutes to define your curls. To do this, take a styling cream and apply it to your hair. Use your fingers to smooth out certain sections of hair to define them.
Dry Your Hair
A frohawk needs to be done on dry hair to maximize volume. If you were to do your frohawk on drenched hair, it could turn out flat and lifeless.
You can allow your hair to air dry, or you can blow dry it to save time. However, you should keep in mind that air drying is, by far, the gentlest hair drying method.
Pick It Out
When it comes to frohawks, the volume is essential. Lift the roots of your hair with a pick to get some extra height.
Note: You don’t want to pull the pick all the way to the ends of your hair. Focus mainly on the roots and mid-lengths of your hair. This is especially important if you want your curls to remain defined.
Form the Frohawk
Take the following steps to get the perfect frohawk.
- Wet the hair on each side of your head until it’s damp.
- Apply a styling gel or edge control liberally to both sides of your head.
- Choose a side and brush the hair upward using a boar bristle brush. Brush it toward the middle of your head without going all the way.
- Use bobby pins to secure the hair in a “mohawk formation.” Try to keep the bobby pins in a straight line going towards the back of your head. To keep the middle portion of the hair full, don’t put the bobby pins too close to the middle of your head.
- Repeat the previous two steps on the other side of your head.
- Use your fingers to shape the loose hair in the middle of your head. You can also add more bobby pins wherever they’re needed.
Experiment with bobby pin placement to achieve a look that’s flattering for your head size.
Consider Using a Clip to Make the Process Easier
The above instructions for frohawk styling include the most basic tools and materials, like bobby pins and rubber bands. But if you are looking for an even easier styling process, you can use a banana clip.
This banana clip was specially designed for people with curly, thick hair and can be used in place of bobby pins to hold the sides of your hair up.
Lay Your Edges
To get a more finished look, you can lay your edges.
Load a bit of edge control onto a soft-bristled toothbrush and then use it to style your edges however you’d like. Keep it simple with a swoop or two, or get creative with spirals and swirls.
Once your edges are laid, you’re done!
Variations on Frohawks
The above instructions are for a basic frohawk. Yet, there are several variations on this popular natural hairstyle.
Ponyhawk
A ponyhawk is a frohawk made of ponytails. They are great for people who want a frohawk with extra flavor via intricate parting.
The ponyhawk also lasts longer than a regular frohawk. If you’re interested in a ponyhawk, follow the steps below:
- Wash, condition, moisturize and dry your hair.
- Part your hair from ear to ear and put a rubber band around the back section to keep it out of the way.
- Divide the front section into three or more sections that extend from ear to ear.
- Apply a styler of your choice to the roots, and then secure each of those front sections with a rubber band. The rubber band should be situated in the middle of your head.
- Repeat the previous two steps on the back section of hair.
- Style the middle portion of your hair. You can set it with perm rods or Flexi rods, curl it with heat tools, etc.
Braided Frohawk
The braided frohawk is yet another version of the frohawk. It features french braids/cornrows along the sides of the head and an afro in the middle.
If you want to know how to create a braided frohawk, read the instructions below:
- Wash, condition, moisturize and dry your hair.
- Part your hair into three sections going from front to back (vertical) using a rattail comb.
- Put a rubber band on the middle section of your hair, as you’ll be working on the sides of your hair first.
- Starting on one of the side sections of hair, begin parting out small to medium sections in whatever pattern you’d like.
- French braid each section. Don’t braid your hair to the ends.
- Repeat the previous two steps on the other section (on the reverse side).
- Style the middle section however you’d like. You can leave your hair in its current state, curl it with a heat tool, install some Flexi rods or perm rods, or anything else you can imagine.
If you don’t know how to french braid, you can do flat twists.
Maintenance for Frohawks
Maintenance is critical when it comes to frohawks, because if the style is not maintained properly, you may need to restyle your hair each day to keep it looking neat.
Manipulating your hair every day can lead to thinning and breakage along the sides of your hair and around your hairline.
To make your frohawk last and minimize breakage, we recommend taking the following steps:
- Cover your hair up at night with a silk or satin bonnet. To ensure maximum nighttime protection, tie a silk scarf around your hairline and then put a satin bonnet on the rest of your hair.
- Clean up your edges sparingly. If you’re covering your hair up at night, chances are you won’t need to do much daily styling. However, if necessary, you can mist your hair with water, reapply your styler, and smooth down the hairs around your hairline. Try not to do this too often.
How Long Frohawks Last
Predicting exactly how long your frohawk will last is impossible. This is because several factors determine how long the style will last, including:
- How secure your frohawk is on the first day.
- Whether you cover your hair up at night.
- How much frizz you can tolerate.
But in general, you can expect your frohawk to last from a few days to a week.
Are Frohawks Protective?
A frohawk can be thought of as a protective style, but it’s only as protective as you make it. Since most of your hair is pulled up while it’s in a frohawk style, the ends of your hair are protected from friction and breakage.
However, if you redo your frohawk every day because you need it to look perfect, this style is not very protective.
The way to wear a frohawk as a protective style is to do the style, cover it up at night, and wear it for a week before restyling.
Pros and Cons of Frohawks
While frohawks are gorgeous and easy to do, there are pros and cons that you should become familiar with before trying the style.
Check out the below list to learn about frohawk advantages and disadvantages.
Pros of Frohawks
- The style is easy to do. Anyone can do a frohawk, and the style can be done on just about any hair length.
- The style can be personalized in a variety of ways.
- They protect your ends from the elements.
- They are undeniably edgy, making you stand out.
Cons of Frohawks
- The style lasts up to a week with proper maintenance, but many struggle to get it to last longer than a few days.
- Bobby pins used to keep the side sections in place can cause some scalp pain.
We believe that the frohawk’s pros outweigh the cons, but you’ll have to be the judge.
Frohawk Dos and Don’ts
While it’s relatively easy to do a frohawk, it’s not uncommon to run into some obstacles with the style. Keep reading to find out the dos and don’ts of frohawks.
Do
- Do ensure that your hair is clean before beginning the styling process.
- Do reposition your bobby pins if any of them feel tight to your scalp.
- Do pick your hair out before forming it into a frohawk to maximize the height of the style.
- Do preserve your edges by brushing them gently and not coating them in too much product.
Don’t
- Don’t wrap rubber bands too tightly around your roots when you’re doing a ponyhawk.
- Don’t skip the moisturizing step, as your hair can quickly dry out in an afro state.
- Don’t use a toothbrush to lay your edges down if your edges are sparse or breaking off.
The History of the Frohawk Hairstyle
The frohawk, named by combining the names of the afro and mohawk hairstyles, is often worn by African-American men and women with naturally curly hair.
The hairstyle can be worn with many variations. Some people will have hair twists on the side, pinned up sides, cornrows or shaved sides similar to a mohawk.
The frohawk hairstyle is thought to be the traditional haircut for warriors out of the African Mandinka tribe.
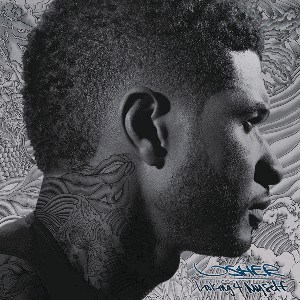
Actor Mr. T also popularized the hairstyle in the 1980s. It then had another resurgence once R&B singer Usher wore a frohawk on the cover of his album titled 'Looking 4 Myself'.
Frohawk & Mohawk Hairstyle Photos
Traditionally, frohawk and mohawk hairstyles have been considered unprofessional. Although, we believe that these hairstyles can be worn casually and professionally.
The options are nearly limitless, but here are a few cool hairstyles that should get your creative juices flowing.
1. Frohawk Fade for Men
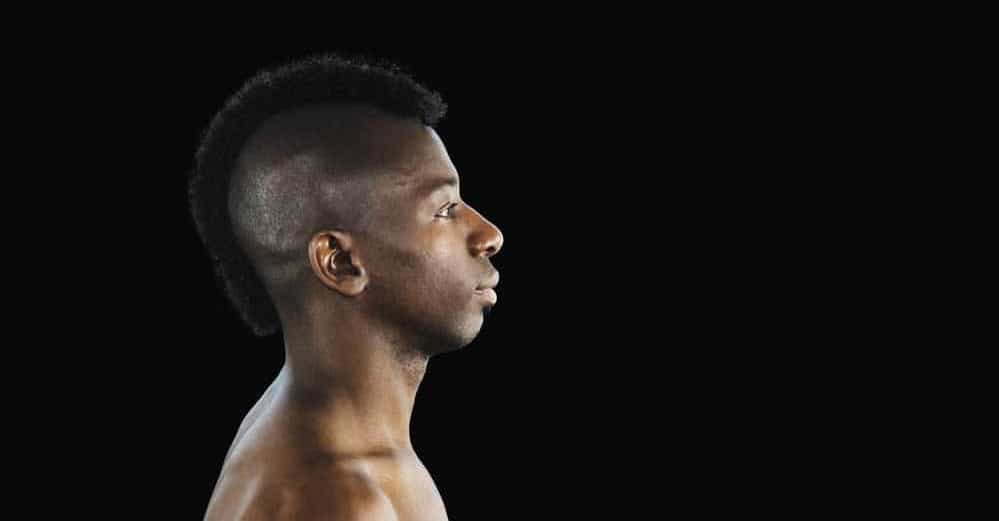
This style of frohawk is masculine and perfect for men who have tight curls. The sides are cut especially short and allowed to fade towards the back. The raised middle section is usually about an inch long.
2. Big Curls with Shaved Sides
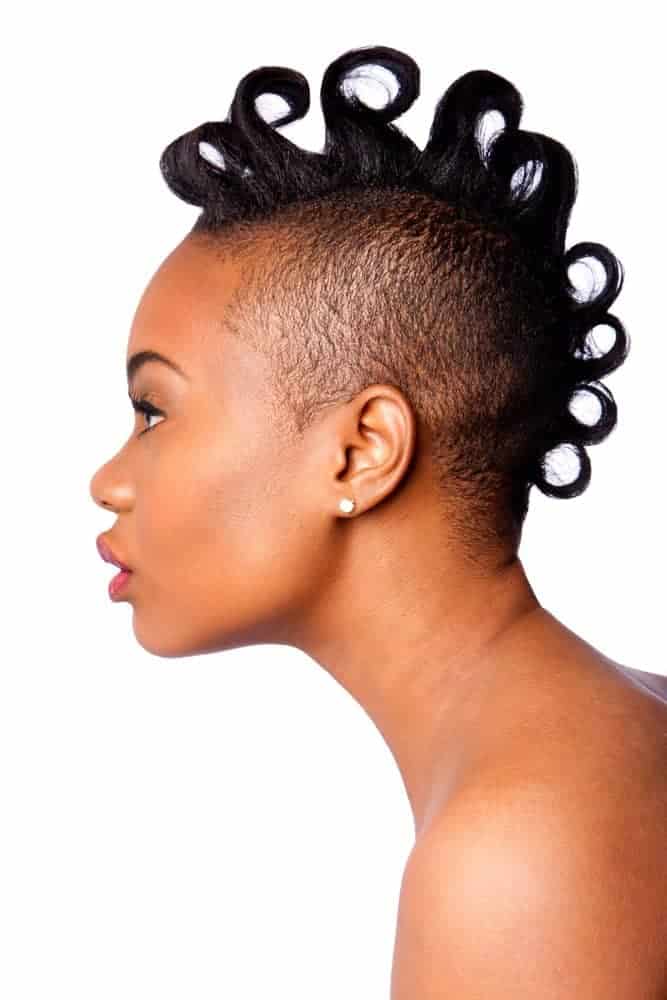
Shaved sides with a big curly frohawk. The central section of the hair shows on the model's beautiful curls. Meanwhile, the hair on the sides has been fade-shaven with a semi-precise line around the sides.
3. Frohawk Fade with Sideburns
The raised frohawk in the middle is perfect for showing off your style. On the side, the remaining hair looks best when shaven with a fade, taking extra care to even up the sideburns. This style looks great on African American men in particular.
4. Blonde Mohawk on Straight Hair
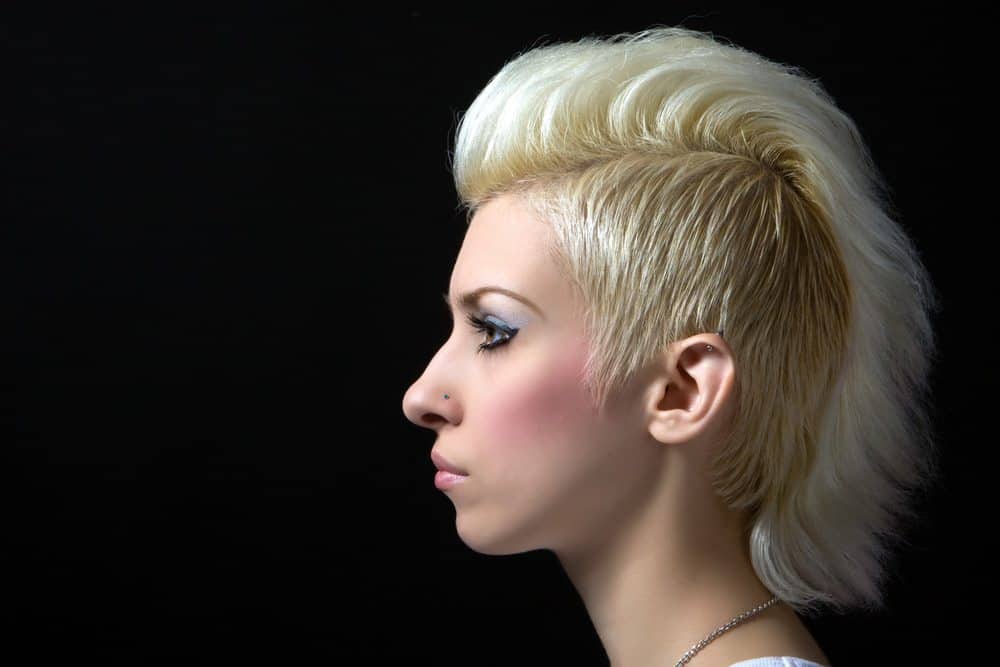
Blonde hair works wonderfully in a mohawk. The main difference is that it's a bit longer up top. If you go with this, you're going to want to keep some hairspray on hand.
5. Side Braided Mohawk on Straight Hair
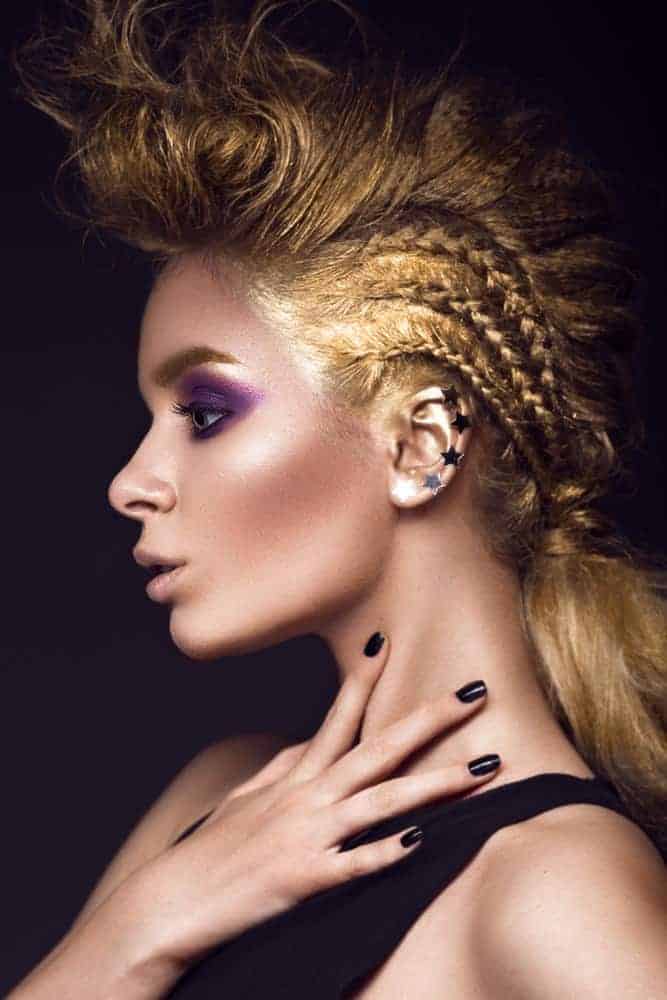
This hairstyle is for only the boldest and most confident ladies. If you have straight hair, it can easily be braided tightly, with ponytail in the back for extra style. This style works best for medium-length hair, although longer hair can work too.
The History of the Mohawk Hairstyle
The mohawk is commonly called a mohican. It's a hairstyle where both sides of the head are generally shaved, which leaves a strip of hair in the center.
Besides being referred to as a mohican, iro is another named for the mohawk. The term iro comes from the Iroquois Tribe, which also wore the popular hairstyle.
Originally mohawk styles were created by plucking the hair out of the head, which sounds painfully. Although it's common today to use hair clippers to recreate the style.
The hairstyle gets its name from the Mohawk Nation, an indigenous group from the Mohawk Valley area in New York. Even so, the association is from a popular movie from 1939 starring Henry Fonda titled Drums Along the Mohawk.
The Mohawk Nation and other members of the Iroquois Confederacy (i.e., Tuscarora, Onondaga, Seneca, Cayuga, and Oneida) were known for wearing a square patch of hair on the back of their heads.
The Mohawk Nation pulled this hair out in small tufts instead of shaving the head like we would do in today's world.
This hairstyle has been around in many areas of the world for years. For example, the Clonycavan Man, which is a 2000-year-old male that was found around Dublin in 2003, was found wearing a Mohawk that was styled with a pine resin and plant oil mixture.
There was also artwork found along the Pazyryk Burials that dates back to 600 BC that depicting Scythian warriors wearing similar mohawks.
There was also a body of a warrior that occupied one of the Kurgans that had been scalped much earlier in life who wore a hair prosthesis that was in the form of a mohawk.
Herodotus, an ancient historian, also claimed that the northern Libyan tribe would shave the sides of their hair, letting the middle grow long.
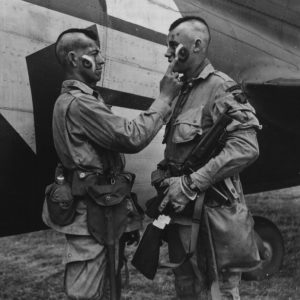
In World War II, some American soliders, thought to be paratroopers, wore mohawks to intimidate their enemies.
American troops throughout the Vietnam War also wore the hairstyle.
Ongoing Styling And Maintenance
Depending on how the mohawk is worn, it can be a very high maintenance style. It calls for careful, regular shaving or trimming to keep the clean lines in between the shaven and unshaven areas of the hair.
If you are going to be wearing the hair up, it may require blow drying, brushing, backcombing and twisting, along with the application of sprays and other holding agents.
Popular holding agents include gelatin, clear or white glue, egg whites and cornstarch. The time required for styling can increase by a great deal when there is longer hair or a complicated style like liberty spikes, also known as the liberty hawk.
Should You Try the Frohawk Style?
Whether you have long curls or short kinks, you can wear a frohawk.
The style can be personalized in so many different ways that we’re confident that you’ll be able to create a frohawk that fits you perfectly. We hope that this article is helpful to you in your styling endeavors.

