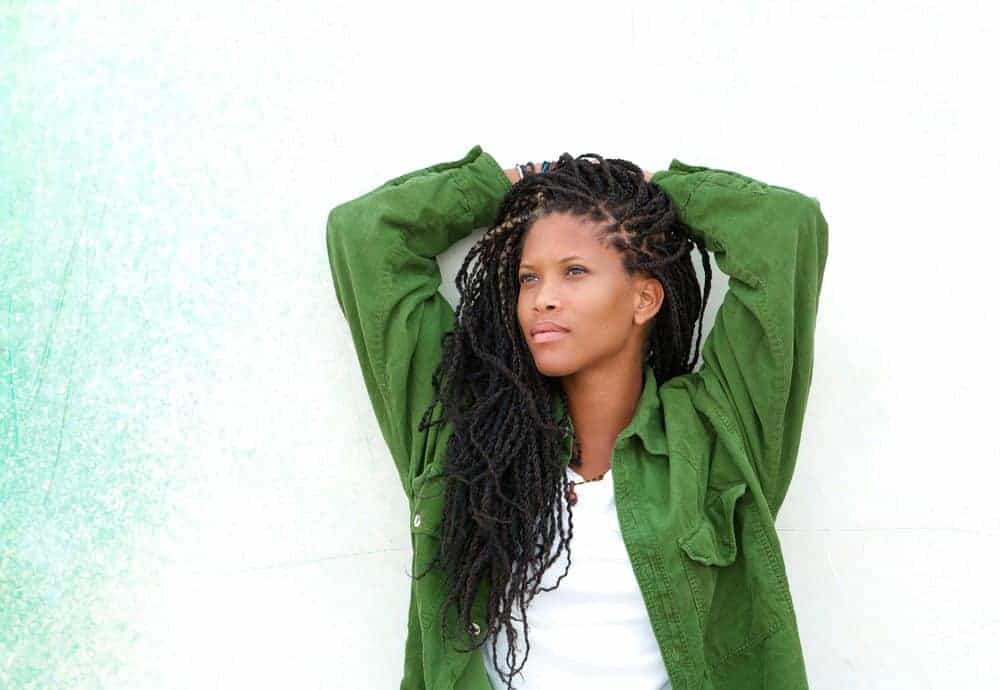
Goddess braids, which are sometimes called Granny Braids, are a soft, more feminine version of traditional box braids. They are a protective style featuring long, rope-like, cornrow-style braids with curly tendrils that usually lie flat along the scalp.
Anyone who’s seen the style will agree that goddess box braids exude a rare, carefree beauty that’s impossible to ignore.
Goddess braids are a great way to protect your hair while it grows and can be braided in many ways.
The typical way for braiding them is in large cornrows. The different styles come about by twisting large braids into a bun or knot in conjunction with smaller ones.
Goddess braids have been popular for a long time. They remain popular due to the number of hairstyles that you can create.
They are very popular because of the versatility that they offer in styling. You can have them look sleek, simple, and casual or styled up for a more elegant look.
If you want to try goddess braids but don’t know where to start, this is the article for you. We will share with you exactly how to do goddess braids step by step.
Table of Contents
- 1 What Do I Need for Goddess Braids?
- 2 Get Your Natural Hair Ready for Styling
- 3 Installing Your Goddess Braids
- 4 Maintaining the Goddess Braid Hairstyle
- 5 Dos and Don’ts of Goddess Braids
- 6 Pros and Cons of Goddess Braids
- 7 The Definitive Guide to Creating Beautiful Goddess Hairstyles
- 8 Zoe Kravitz Boho Box Braids
- 9 Cute Goddess Braid Hairstyles
- 10 How To Do Goddess Braids with Weave
- 11 The History of Cornrows
- 12 Modern Cornrows
- 13 Kanekalon Braiding Hair
- 14 Protective Styling for Length Retention
- 15 The "Bad" Hair Day: Protective Styling Natural Hair
- 16 Awesome Granny Braids on Straightened Hair
- 17 Goddess Braids with a Marley Twist
- 18 Two-Sided Goddess Braids with Clip-Ins
- 18.1 What Are Goddess Braids?
- 18.2 How Long Do Goddess Box Braids Last?
- 18.3 Are Goddess Braids for Me?
- 18.4 Are Goddess Braids Good for Your Hair?
- 18.5 What Is the Difference Between Goddess Braids and Bohemian Braids?
- 18.6 What Kind of Hair Do You Use for Bohemian Goddess Box Braids?
- 18.7 Can Goddess Braids Be Knotless?
- 18.8 Are Goddess Braids a Good Protective Style?
- 18.9 Related Articles
What Do I Need for Goddess Braids?
The first step in any styling session is to obtain your supplies. You’ll need the following supplies to do the goddess style:
- Styling gel
- Edge control
- Sulfate-free shampoo
- Moisturizing conditioner
- Penetrating deep-conditioner (optional)
- Wide-toothed comb
- Rat-tailed comb
- Butterfly clips
- Rubber bands (optional)
- Denman brush
- Braiding Hair
- Wavy Hair
- Superglue
- Scissors for hair
- Gold hair cuffs (optional)
The Type of Extension Hair Matters
Goddess braids require two types of extension hair: braiding hair and wavy hair.
Braiding Hair
The braiding hair should be 100% kanekalon hair, which has the perfect texture for braiding. You can choose from many extension hair brands, but X-Pressions brand braiding hair is known to be softer than the rest.
You also get more hair per pack with X-Pressions hair than any other brand.
Here are some other synthetic braiding hair options:
Wavy Hair
When it comes to the wavy hair (which will hang loosely), you have multiple choices. You can choose synthetic hair or human hair.
Human hair costs more than synthetic hair because it’s of higher quality. Synthetic hair tends to get matted and look old after a short time.
On the other hand, human hair looks good throughout the life of the style and won’t get matted quickly.
Here are some wavy synthetic hair options to consider:
- Freetress Deep Twist Synthetic Hair
- Freetress Loose Deep Wave Synthetic Hair
- Freetress Water Wave Synthetic Hair
Here are some wavy human hair options to consider:
How Much Hair to Buy for Extensions
Now that you know the types of hair you’ll need for your goddess braids let’s talk a bit about how much hair you’ll need to complete the style.
Braiding Hair
You’ll need enough braiding hair to do box braids all over your head. The amount of hair you’ll need depends on your head size and how full you want your braids to be.
As a general rule, you’ll need anywhere from 5 to 7 packs of synthetic braiding hair. If you want your braids to be extra full (i.e., thick goddess braids) and you have a larger head, err on the higher end of the spectrum.
If you want your braids to be closer to a natural thickness, you can get by with fewer packs of hair.
Wavy Hair
You’ll need much less wavy hair than braiding hair since you’ll only be adding a tiny portion of the wavy hair to the braids.
The amount you’ll need will depend on how much wavy hair you want to incorporate into the style. Most people can get by with just one or two packs of wavy hair.
Get Your Natural Hair Ready for Styling
You may be excited to get into the braiding process, but it’s imperative not to neglect your natural hair. The information in the following sections will help you get your natural hair ready.
Shampoo
Shampooing your natural hair should not be optional when you are doing a protective style. Break out your favorite shampoo, provided that it isn’t loaded with synthetic ingredients, like sulfates and parabens.
While you should focus the shampoo on all of your hair, ensure that you scrub your scalp thoroughly. You won’t be able to deep clean your scalp for months after installing your goddess braids.
Condition
After your hair is free of product buildup, debris, and dust, you’re ready to replenish the moisture lost during the shampoo session.
Choose a conditioner that has moisturizing properties. Quality conditioners have oils and emollients to breathe life into dry hair. If you struggle with dry hair, you may need to deep condition your hair.
Take some time and apply a deep conditioner of your choice while your hair is still wet from the shampoo session. Use your wide-toothed comb to aid in product distribution.
Whether you choose to condition or deep condition your hair, make sure that you detangle your hair during this step.
Moisturize
While your hair is still wet from rinsing the conditioner out, it’s time to apply your moisturizer. Apply it all over your hair and comb it through with your wide-toothed comb to ensure all of your strands are hydrated.
Stretch Your Hair (Optional)
If your hair is very tightly coiled (4D hair) or kinky (4C hair), you will have difficulty getting it to blend in with the braiding hair. If you take an extra step and stretch your hair out, the braiding process will be much easier.
Choose from one of the following stretching methods:
Blow Dry
Perhaps, the easiest way to stretch your hair is with a blow dryer. Brush through your hair while blasting air on it. Keep in mind that you don’t necessarily have to use heat on your hair.
Most blow dryers come with a “cool” button, and you can stretch your hair just fine with the cool setting. But if you want to use heat, be sure to use a heat protectant beforehand.
Elastic Bands
If you want to stretch your hair using a 100% heat-free method, the elastic band method may be for you. Follow the instructions below to stretch your hair with elastic bands:
- Separate your hair into four or more equal sections.
- Put a small elastic band on each of the sections.
- Work on one section at a time wrapping elastic bands around the length of the section to stretch it out. Start wrapping at your roots and stop wrapping when you get to the ends.
- Allow the sections to air-dry. They may need several hours to dry, so some people prefer to let their hair air-dry overnight.
- Remove all of the bands once your hair is dry. If you take the bands out before your hair is dry, it will revert.
Braid It
If you don’t have a blow dryer or elastic bands, there’s no need to worry. You can simply braid your hair while it’s damp and allow it to dry.
If your hair is already dry, this method will still work, but the braiding process may be more painful on dry hair.
Installing Your Goddess Braids
Your hair is washed, conditioned, moisturized, and stretched, and now it’s time to install your goddess braids. Follow the steps below to do your braids.
Prepare Your Extensions
Synthetic braiding hair is often sold with blunt ends, which aren’t suitable for this particular style. So, before you begin braiding, you’ll need to feather the hair.
Feathering synthetic hair is extremely easy; follow the steps below:
- Take the hair out of the package and remove the rubber bands or twist ties holding the hair together.
- Hold the hair in one of your hands with the ends pointing upwards.
- Use your other hand to pull up small sections of hair repeatedly.
- Stop feathering when the ends are no longer blunt.
- Hold the hair at the halfway point and use the other hand to finger comb the hair.
Once the ends have been feathered, it’s ready for installation.
The wavy hair, on the other hand, does not require much preparation. Just trim it to your desired length, and it’s ready to go!
Section Your Hair and Part Out the First Section
Section your natural hair into four sections with your rat tail comb. Take your time while parting, as clean parts are necessary for this style. Then, secure three of the four sections with a rubber band, butterfly clip, or braid.
Part out a small, medium, or large section; it will be your first goddess box braid. The size you make your sections will depend on your desired braid size.
Create Cute Goddess Braids for Beginners
Now that your natural hair has been sectioned and you’ve parted out your first section, it’s time to get to braiding. Do the following to install your braids:
- Add some edge control around the borders of your first section.
- Grab some braiding hair and hold it at the base of your natural hair.
- Using your natural hair as one of the three braiding sections, begin to three-strand plait (or braid) your hair in with the extension hair.
- After you’ve braided down about an inch, grab a small amount of the wavy hair and join it with two of your braiding sections.
- After braiding down about a half-inch, pull one of the wavy sections outside of the braid. You can use a clip to keep the wavy hair out of the way.
- Continue braiding the hair down.
- When you get to where the extension hair meets the wavy hair, apply one drop of superglue there and allow it to dry. The glue will keep the braid in place while the wavy hair remains loose.
- Cut off any scraggly ends if you desire a clean look.
- Repeat the process all over your head.
- Shape the ends of your hair with hair scissors (i.e., hair shears) if you’d like.
How Long Does Installation Take?
Goddess box braid installation can take anywhere from 2 hours to a day or longer. The actual installation time for you will depend on the following:
- How quickly you can braid
- Your desired braid length
- The size of your head
- How large you make your parts
If you’ve never done goddess braids on yourself before, block off a considerable amount of time for the installation. You don’t want to have to go somewhere with half-braided hair.
Maintaining the Goddess Braid Hairstyle
After going through all the trouble of installing goddess braids, we’re sure you want to make the style last. Use the tips below to help you properly maintain your braids:
- Wrap them up at night with a silk/satin bonnet or scarf. This helps to minimize frizz and extend the life of the style. If you don’t protect your hair at night, the style will not last.
- Oil your scalp as needed. If you plan on wearing the style for longer than a week or so, you may notice that your scalp gets dry or itchy. Use a light oil to hydrate your scalp whenever necessary. Jojoba oil, grapeseed oil, or sweet almond oil will work perfectly.
Watch this video for a demonstration of how to maintain the style.
Dos and Don’ts of Goddess Braids
Goddess braids have a potentially complicated installation process. To help you avoid issues with your braids, here are some dos and don’ts you should follow.
Dos
- Do have many clips on hand. It can be frustrating to keep those wavy hairs out of the way as you braid down to the ends. Use clips to help you keep the hair where you want it.
- Do be patient. Depending on your desired braid size, goddess braids can take a long time. But if you rush, the style may not last long or look clean. Be patient and take your time to get the best results.
Don’ts
- Don’t braid your hair too tight. Gripping your natural hair too tight can lead to breakage and hair loss. You don’t need to braid the hair extremely tight for the style to last.
- Don’t forget maintenance. The length of time your braids ultimately last will depend on how well you maintain them.
Pros and Cons of Goddess Braids
Goddess braids come with a unique set of pros and cons, and we’ll reveal them to you in this section.
Pros
- Long-term protective style. Goddess braids are a long-term protective style that can last up to a couple of months. Once you reach the two-month mark, it’s time to take the style down. We usually recommend wearing the style for up to six weeks.
- Carefree beauty. Big Goddess braids are undeniably beautiful, giving off a bohemian vibe that’s on-trend right now.
- Easy maintenance. All you need to do to maintain the style is to oil it from time to time and cover it up at night.
Cons
- Difficult to install. Some may find goddess braids very difficult to install on themselves.
- Long installation time. Just like other braided styles, the installation time for goddess braids is relatively long.
- Heaviness. The extension hair used for the style has the potential to feel heavy and cause neck pain. It can also be damaging to your baby hair and edges.
- Superglue is part of the installation. Some may be against using superglue to seal the braids.
The Definitive Guide to Creating Beautiful Goddess Hairstyles
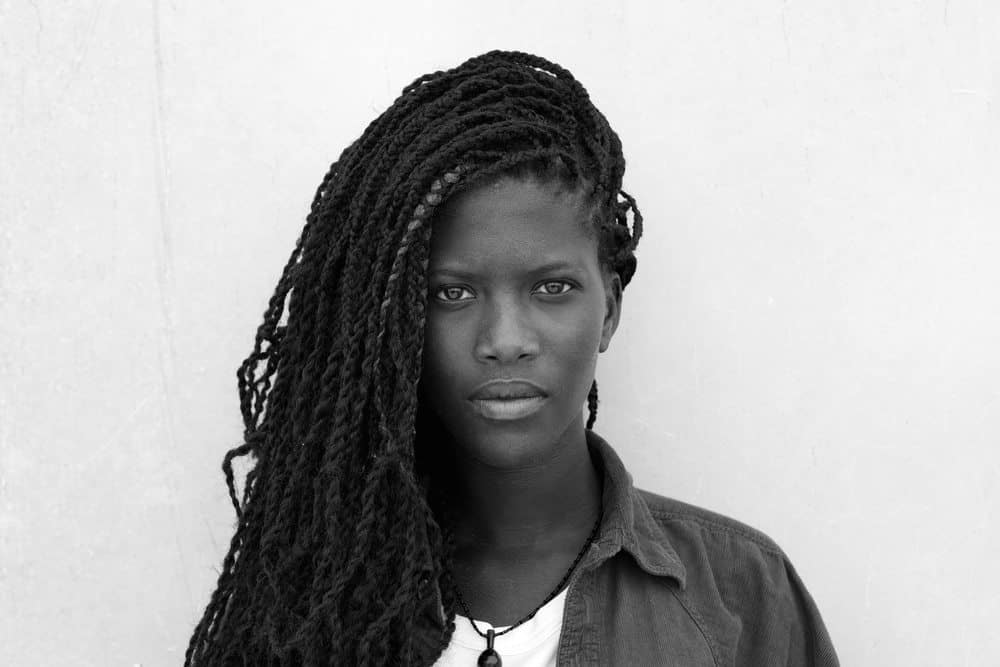
Everywhere you look now, whether it's on YouTube, Instagram, or at star-studded events like on the red carpet, there's a good chance that you will see someone rocking goddess locs.
They are a trendy hairstyle right now. But what's the difference between goddess locs and regular locs, you may ask?
Goddess locs are unique as they are usually styled with wavy or curly hair at the ends, often detailed with gold jewelry to give them a beautiful royal appearance.
The following tutorials demonstrate some of our favorite methods of wearing goddess locs:
The Traditional Method of How to Do Goddess Locs
The traditional goddess locs installation method starts by first sectioning hair into a few sections and then box braiding the hair. Loose, curly extensions are then added to the ends.
Then the braiding hair is wrapped around every box braid to create the goddess locs. This approach is time-consuming because, in addition to the box braiding, there are several steps to create the goddess locs.
We recommend having your stylist loosely wrap your hair right below the roots to ease the tension caused by tight locs and the combined weight of the hair. This is critical from a protective styling standpoint.
To create an even more unique look, you can garnish your locs with gold clasps and white yarn. Although, keep in mind that just like the installation, taking down these locs will also be very time-consuming.
For this style, you need you will need approximately eight packs of Rast A Fri Freed'm silky braiding hair and two packs of Freetress braiding hair.
Looking for a Quicker Approach to Braiding Your Hair?
If you want a much faster method than the traditional method of installing goddess locs, you can follow the technique used by Bre’Aunna Renee ("Bray"), also known as DOPEaxxPANA, on YouTube. Bre'Aunna is a self-taught stylist in the California Bay area.
Instead of braiding her client's entire head, which takes longer, Bre'Aunna starts by plaiting the sectioned hair. This method creates a lot less tension on the hair and scalp, which is critical to avoid potential hair loss or breakage issues with tight braids.
Bre'Aunna pulls Freetress's deep wave hair through the plait base using a crochet needle for the curly ends. She then wraps Cuban twist braiding hair tightly around the wavy hair.
Braids it into loc form, then uses nail glue to secure it while leaving the wavy hair hanging at the ends. This approach takes a lot less time to install and remove.
For this style, you need you will need approximately three packs of Cuban twist braiding hair, and for the ends, two packs of Freetress Deep Wave braiding hair.
Crochet Goddess Locs: A Quick Detailed Tutorial
Chunky Cornrows Only
Since the traditional method takes a long time, crochet goddess locs usually are much better for those in a hurry or those who want a hairstyle with less tension on the hair.
In this video, a vlogger known as Tastepink uses three types of braiding hair to achieve her look. She starts by cornrowing her hair towards the back, ensuring that the cornrows are smaller at the front for a neater look.
She then braids the faux locs beginning from the back of her neck to the top of her head. To conceal the gaps, she adds more locs to the center of her head.
Cornrows & No-Cornrows Crochet Method
If you prefer the crochet method, but you're concerned about a "natural-looking" part appearing, you may use a combination of individual braids and cornrows to get the look you want.
In addition to the no-cornrows approach, Jazz Nicole shared six more interesting ways to install single locs. All the methods start with a single braid with no added hair, which then changes into a twist about one-third of the way down.
Here Are Her Goddess Loc Methods:
- Hug method: With the hug method, Jazz slightly opens up a crochet loc, then twists braided hair down that loc creating a goddess loc.
- Pull method: Using the pull method, Jazz inserts a crochet needle into a loc and then pulls the braid through the loc. According to Jazz, this method is great for ladies with curly locs.
- Braid-in Method: Interestingly, with the braid-in method, Jazz just puts the crochet loc loop around the base of a single section of her hair. Jazz proceeds to split the section into two, then uses the hair and a loc to make a braid. This results in one nice loc that started as a braid. According to Jazz, this approach is best suited for small locs and locs matching the color of your natural hair.
- The Knotless Method: The knotless method is one of our favorites, as it gives you a seamless base. Jazz starts by splitting a section of hair into two pieces, then puts a piece through the crotchet loc loop. She then braids the hair to secure the loc. She then applies the pull method hiding the braid completely. This method has a very natural-looking end result, which is why we particularly like this approach.
- The Wrap-in Method: Jazz starts the wrap-in method by following the knotless method (discussed above), then wraps the hair from an unraveled loc around her braid. This particular method also has a natural look, but it can be time-consuming.
- The Braided Wrap-in Technique: The braided wrap-in technique is most suitable for large locs. Jazz braids an unraveled loc into her hair, then wraps the loc around her braid.
How to Take Down Goddess Locs
After a few weeks of looking fabulous in your goddess locs, it's time to take them down. During this next section, we're going to show you teach you how to take out goddess locs.
How to Take Out Traditional Goddess Locs
There are two ways to do this; you can chop off the ends (often preferred because it's quick) or separate them first (much safer) if you don't want to risk cutting off your real hair.
If you have very long hair, we highly recommend using the safer approach to prevent cutting your hair.
How to Take-Out Crochet Goddess Locs
Start by pulling your natural hair out from the faux loc, then unloop your crochet loop, pulling out both the faux hair and your natural hair from under your crochet loop.
If you want to reuse your locs later, this is the best method to take them down.
Zoe Kravitz Boho Box Braids
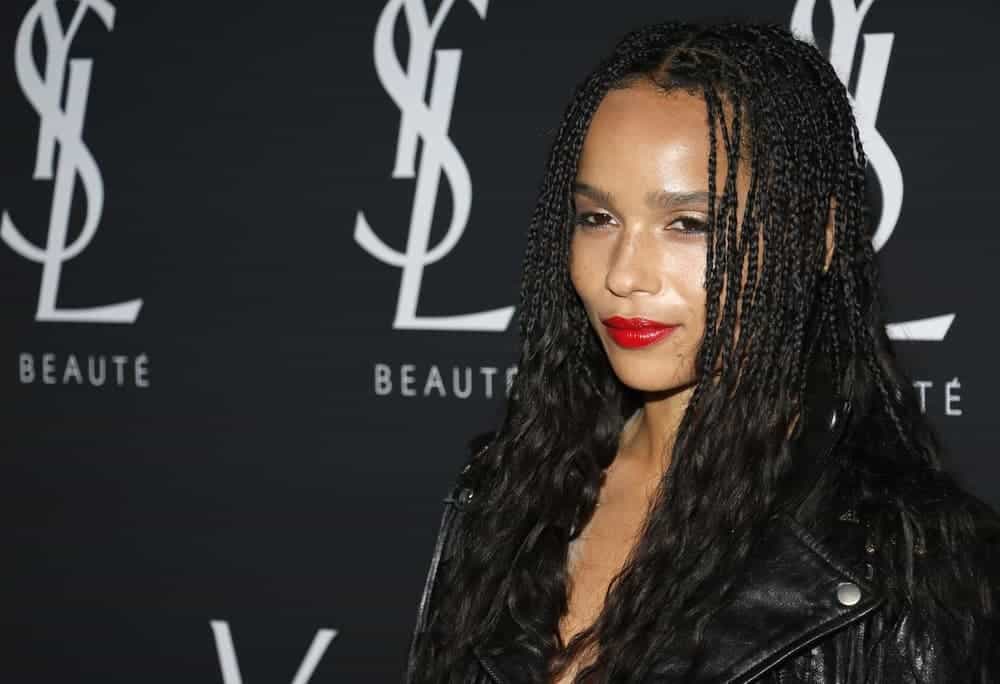
In case you didn't get the memo, Boho box braids, which are also referred to as goddess braids or gypsy box braids, are officially one of the most popular braiding styles nowadays.
You may have already seen a few of your favorite celebrities, such as Jhene Aiko, Eva Marcille, Alicia Keys, or Zoe Kravitz, rocking these new box braids, but if you are yet to, picture the style as a fantastic mesh between box braids and goddess locs.
If you are looking to achieve the Bohemian look without spending as much time as you normally have to with traditional box braids, Boho braids are a great option for you, as you don't have to braid the hair and then wrap every single braid with thread.
Zoe Kravitz Boho Box Braids vs. Traditional Box Braids
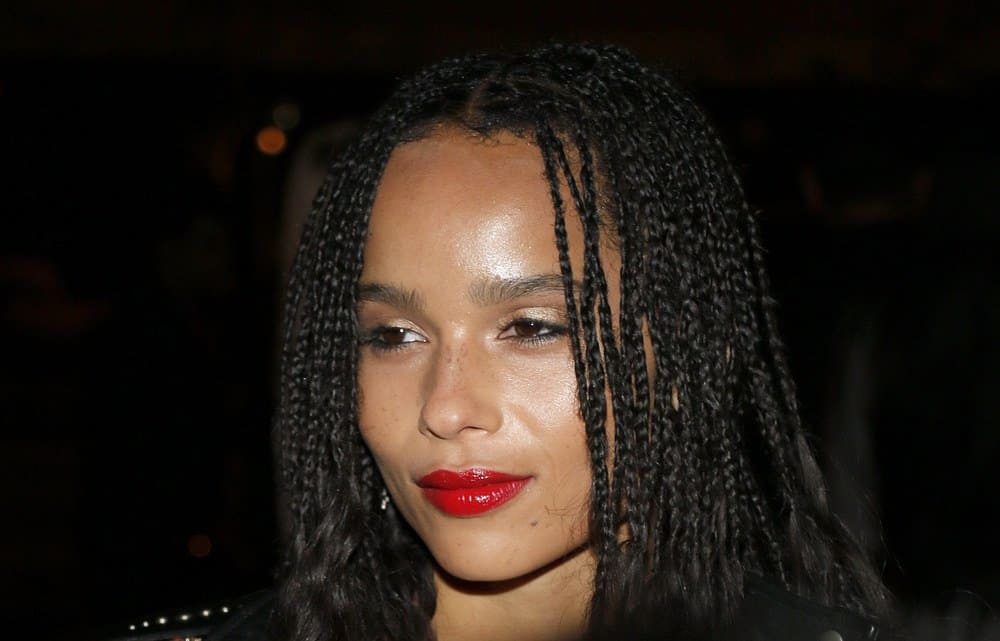
The difference that stands out between traditional box braids and Zoe Kravitz Box Braids is that Boho braids usually have a less uniform appearance, with wavy hair carefully added in select spots to create a wispy, carefree vibe.
The look is less polished from the ends to the parts. If you check some of her pictures, you will see Zoe Kravitz accessorizing her Boho box braids with embellishments such as hair jewelry or playing with colors, which spices up the hairstyle even more.
What Type of Hair Do You Need for Zoe Kravitz Braids?
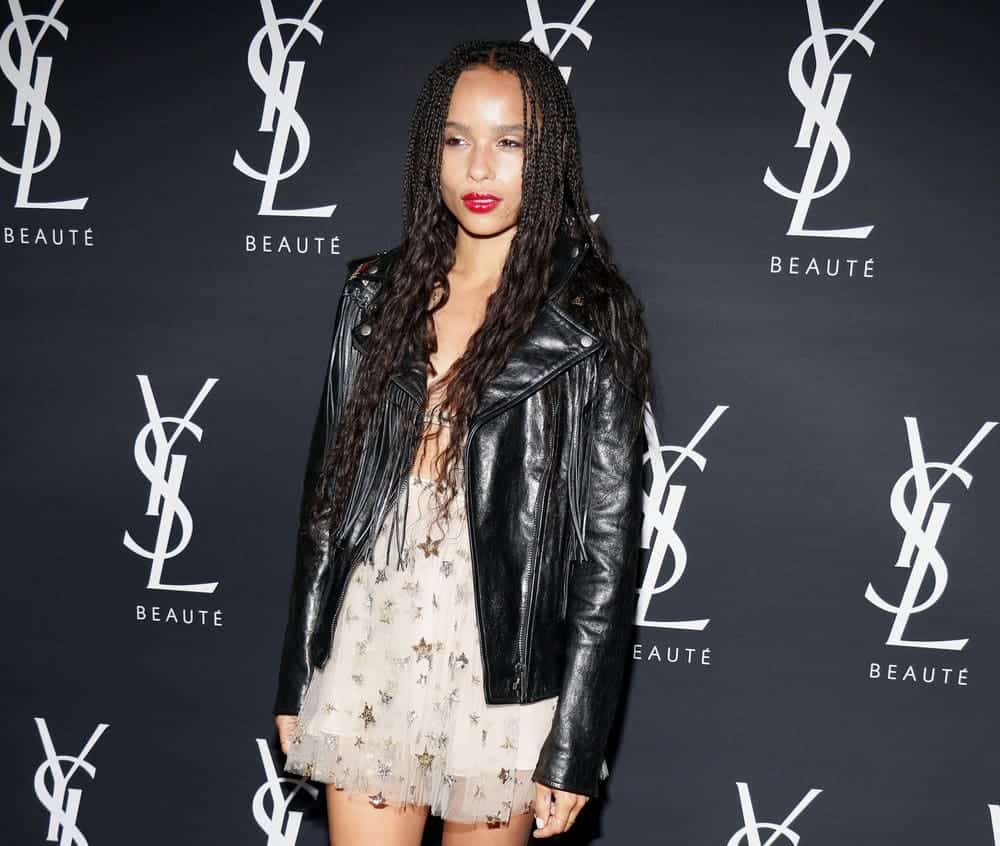
As mentioned above, the main identifying feature of Boho box braids is that they are used to showcase two types of hair textures, straight braided hair, and wavy, textured hair added to the ends of the box braids.
If you use regular Kanekalon braiding hair, you can expect it to be a challenge getting the signature wavy appearance of Boho box braids.
However, there are many techniques you can try to achieve this look:
Using Soft Synthetic Hair for Boho Braids
In this video, Shanice Crystal shares her hairdresser's technique for creating a wavy look by using a few packs of X-Precision braiding hair. The hair can be found on Amazon as well as in most beauty supplies stores.
X-Precision braiding hair is softer than Kanekalon hair, and you also get more X-Precision in the pack compared to most Kanekalon hair packs. You will first need to braid some of the braiding hair from the base to the tips leaving the ends unbraided.
Shanice Crystal's hairdresser braids six sections of her braids into large braids before dipping them in hot water for the setting process. After some time, she unravels the large braids revealing a gorgeous wavy look.
Another vlogger and beauty influencer known as LipsticknCurls also used synthetic hair for the braids. Unlike Shanice, she used Organique Mastermix braid hair, which can also be found on Amazon and in local beauty shops.
While using softer hair can result in a more wavy and clean look, it also increases the chances of your Boho box braids unraveling. LipsticknCurls admitted that she was forced to redo some of the braids after they unraveled.
However, she also shared that she never dipped her hair in hot water. Some hairdressers use nail glue at the ends of each braid to prevent unraveling.
Using Kanekalon Hair for Quick Boho Box Braids
If you're in a hurry, Lynda Moyo shares how to get signature Boho waves by using a flat iron on Kanekalon braiding hair on low heat.
Her technique is similar to the others, and the primary difference is that she leaves the ends of her braids unbraided.
To make the hair sleeker, Lynda flat irons the ends of the braids on low heat. She then braids the individual braids into three large braids and runs her flatiron over the giant braids to set them.
The flat iron allows Lynda to skip waiting for her hair to dry. She then unravels the large, wavy braids.
Using Goddess Crochet Braids for Boho Box Braids
Most braiding styles take several hours to install, which can be extremely exhausting. Luckily, there's a crochet version that will definitely save you a lot of installation time.
You can now find more companies selling Boho individual braids with curly ends already for those who don't have much time to spare.
Adanna Madueke uses individual braids and synthetic crochet hair in the front to achieve a more realistic appearance. She used 24" Crochet Zoey Braids from Model Model. These braids will have the ends looking more curly than wavy.
Cute Goddess Braid Hairstyles
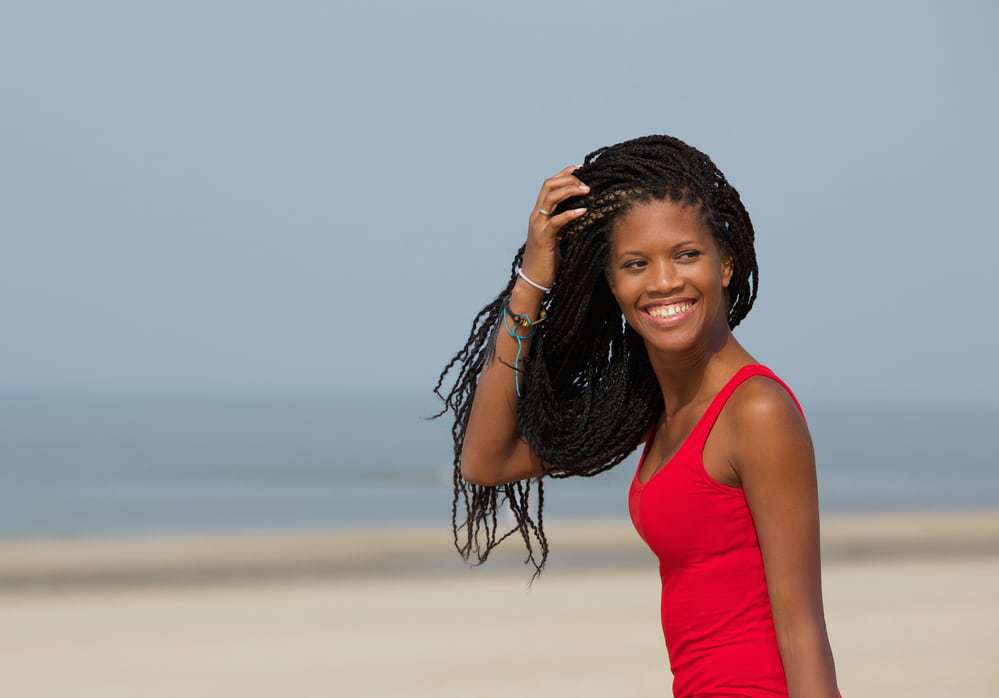
One of the most appealing aspects of goddess braids is the unique artwork that goes into every hairdo. By implementing goddess hairstyles into the design, you then incorporate a new dimension into the style.
How To Do Goddess Braids with Weave
Breanna Rutter takes you through a step-by-step demonstration of a gorgeous pinwheel low bun using Kanekalon hair.
The History of Cornrows
Braiding the hair in cornrows is a tradition that has been around for as long as there has been hair styling.
Cornrows are common in African American history and are depicted in sculptures found in Nigeria that go back as far as 500 BC.
Modern Cornrows
Cornrows are something African-Americans have worn since long before the Civil Rights movement. In modern times women of all races have embraced the style and made it their own.
Wearing cornrows is no longer exclusively fashionable for black women. Hairstylist Guido Palau even incorporated the look into Valentino's 2015 Paris Fashion Week show by having the models all wear cornrows.
Guido Palau's decision prompted several viral articles, including one asking if African Americans own cornrows. How do you feel about other races wearing cornrow hairstyles?
One of the more fashionable cornrow styles worn during the summer is the coily mohawk, which is a sexy hairstyle with the hair braided up on either side into a coiled mohawk on top.
There is also the twisted high bun, where the hair is braided up to the top of the head and twisted in a braided bun for a very classy look. Use this technique to create a Goddess braids updo.
Kanekalon Braiding Hair
If you're planning to create Goddess Braids with weave hair, we recommend using kanekalon braiding hair simply because we like the look and durability of this type of hair weave. Although, you may use any type of braiding hair that you prefer.
Protective Styling for Length Retention
Goddess braids are a great way to protect your hair from the wear and tear that is associated with constantly styling it.
They offer the added benefit of encouraging length retention because the braided hair will not be bothered by repeated manipulation.
Also, it will not come into contact with surfaces such as cotton pillowcases or cloth car seats. Goddess braids also protect your hair against harsh weather conditions.
It's important to note that protecting your hair by twisting them into goddess braids is step one in protecting your hair. Once they have been twisted in, you have to keep them moisturized regularly.
The "Bad" Hair Day: Protective Styling Natural Hair
Sometimes your style is several days old, or you're not "feeling" your hair that particular day. London Rach conquers her bad hair day with these simple, chic goddess braids.
Awesome Granny Braids on Straightened Hair
Granny braids are versatile and look good on all hair textures. In this video, Meg demonstrates a classy braided style on straightened natural hair.
Goddess Braids with a Marley Twist
Marley braiding hair used in a goddess braid style allows you to achieve a smooth and sleek look. Blending with natural textures, the Marley hair adds length to your braids.
Two-Sided Goddess Braids with Clip-Ins
By loosening the braids close to the scalp, a more textured, soft, and natural look is achieved with your goddess braids.
What Are Goddess Braids?
Goddess braids are cornrow-style braids that date back to Ancient Africa. They are thick and often styled in a crown pattern around the head and can be styled in various patterns for a unique look. Goddess braids are low-maintenance, protective hairstyles that can be worn for several weeks and styled with or without extensions.
How Long Do Goddess Box Braids Last?
Goddess box braids can last anywhere from 4-8 weeks, depending on the type of hair used, the tightness of the braids, and the individual's hair growth and maintenance. The braids can be kept longer, but removing them after eight weeks is recommended to avoid hair damage and breakage. Moisturizing the scalp and braids can prolong their longevity.
Are Goddess Braids for Me?
Goddess braids may be for you if: (1) you have healthy hair without thinning or breakage, (2) you know how to braid and have the patience to install the braids, and (3) you don't have a problem with super glue. There are great for versatility, as you can create everything from straight-back goddess braids to small goddess braids combined with a gorgeous updo.
Are Goddess Braids Good for Your Hair?
Goddess braids can be a good option for some people looking to protect their hair, especially if they are prone to dryness, breakage, or split ends. If installed correctly and properly cared for, goddess braids can protect the hair from environmental damage and reduce the need for frequent styling and heat usage.
What Is the Difference Between Goddess Braids and Bohemian Braids?
Goddess braids are small to medium-sized cornrow-style braids that are styled in a crown-like pattern around the head. Bohemian braids are a type of free-spirited, more relaxed, and unstructured braided hairstyle. They are often larger and looser than goddess braids and can be styled in various patterns, such as in a half-up, half-down style, or a single braid.
What Kind of Hair Do You Use for Bohemian Goddess Box Braids?
For Bohemian goddess box braids, hair extensions can be made of synthetic, human, or blended hair. Synthetic hair is budget-friendly but can tangle easily. Human hair is more natural and can be styled like natural hair, but it is more expensive. Blended hair is a combination of both and offers both affordability and versatility.
Can Goddess Braids Be Knotless?
Goddess braids can be knotless. Knotless braids are a type of braiding technique where the braids are created without the traditional knot at the scalp, which can cause discomfort or tension. Instead, the braid is attached to the hair using a small amount of hair from the root, which creates a more comfortable and natural-looking braid.
Are Goddess Braids a Good Protective Style?
Yes, goddess braids can be a good protective style. Protective hairstyles are styles that help protect the hair from damage, breakage, and excessive heat styling. Goddess braids involve braiding the hair close to the scalp, which helps protect the hair from environmental damage. However, protective hairstyles should never be too tight, as this causes tension, discomfort, and hair loss.
- How to Loosen Tight Braids
- How to Make Frizzy Braids Look New
- How to Wrap Braids With Scarf at Night
- Different Types of Braids Styles for Black Hair
Goddess braids are a beautiful protective style that is popular for many reasons.
One of the main benefits of goddess braids is that they provide you with an opportunity to protect your hair while it grows, which can be done in various ways depending on your styling preferences and desired length.
Whether you choose to wear red goddess braids, double goddess braids with a high bun, or use braiding hair to create jumbo goddess braids, this chic style is a conversation starter.
So if you want an easy way to protect your hair from daily manipulation while encouraging length retention, we hope that this article has taught you all about how to create goddess braids hairstyles so that you can get started on creating yours today!


