From time to time, all of us want thick, long, flowing hair, and
The type of hair to purchase, the installation method, and the parting pattern are all things that need to be clear before you start. If you're a bit lost and unsure of where to turn, we've got you. Here's a detailed look at how to install
Table of Contents
- 1 What Are Hair Extensions?
- 2 Hair Extension Methods
- 3 Step-by-Step Instructions for Installing Hair Extensions
- 3.1 Gather Your Supplies
- 3.2 Prepare Your Natural Hair for Extensions
- 3.3 Stretch Your Hair (Optional)
- 3.4 Install Your Extensions
- 3.5 Install Clip-in Extensions
- 3.6 Install Sew-In Extensions
- 3.7 Install Glue-In Extensions
- 3.8 Install Crochet Extensions
- 3.9 Pros and Cons of Extensions
- 3.10 Dos and Don'ts of Extensions
- 4 How to Install Curly Hair Clip-ins
- 5 How to Install Clip Ins on Short Natural Hair
- 6 An Overview of Hair Extensions
- 7 How to Tell If Your Extensions Are Good Quality
- 8 The Best Human Hair Weave Bundles
- 9 Indian Hair Extensions
- 10 Chinese Hair Extensions
- 11 European Hair Extensions
- 12 When Do We Recommend Wearing Hair Extensions?
- 13 What are Remy Hair Extensions (aka Remy Human Hair)?
- 14
- 15 Types of Hair Extensions Pros and Cons
- 16 Types of Weft Hair Extensions
- 17 Types of Premium Hair Extensions
- 18 Synthetic Hair Extensions
- 19 Futura Hair
- 20 The Properties of Human Hair
- 21 Integration Methods
- 22 Debunking Common Hair Extensions Myths
- 23 Natural Hair Weave Companies
- 24 Some Final Advice on Buying Hair Extensions
- 24.1 Clip-In or Flip-in Hair Extensions are Good for Beginners
- 24.2 Conduct Due Diligence Before You Buy
- 24.3 Purchase 100% Remy Human Hair Extensions
- 24.4 How Do You Match Hair Extensions
- 24.5 When Do We Recommend Wearing Hair Extensions?
- 24.6 When Do Extensions Become Problematic?
- 24.7 Installing Hair Extensions is Quite an Undertaking
What Are Hair Extensions ?
Human
Human
Hair Extension Methods
The hair extension business is vast, and there are many hair extension options and methods available. Some of the most commonly used hair extension installation methods include:
Clip-In Hair Extensions
Clip-in
Sew-In Hair Extensions
Sew-ins are preferred in some cases because they are a long-lasting, minimally damaging method to add
Glue-In Hair Extensions
Many hair experts rave about glue-ins for their ability to blend seamlessly into natural hair. Glue-ins are used to add hair length and increase volume, all while being undetectable. For this method, you add specialized hair glue to hair wefts and then place them at the roots of your hair.
Crochet Hair Extensions
The crochet hair extension method is similar to a sew-in. Crochet
Step-by-Step Instructions for Installing Hair Extensions
If you're ready to take the plunge and do some
Gather Your Supplies
The first part of the process is getting your supplies together. Ensure that your shopping list includes the following supplies:
- Extension Hair (human hair is the best quality)
- Wide toothed comb
- Rat tail comb
- Denman Brush
- Shampoo
- Conditioner
- Deep conditioner (optional)
- Moisturizer
- Hair glue (for glue-in extensions)
- Styling gel, cream, or mousse
- Thread and curved needle (for sew-in extensions)
- Latch Hook (for crochet extensions)
- Toothbrush
- Hair scissors
- Heat protectant
Extension Hair Options
hair extensions because they can be reused, and they look natural.
However, if you want to try extensions for a short time and don’t want to reuse them, you can go for synthetic extensions. Just keep in mind that they will not look very natural and may tangle quickly.
Prepare Your Natural Hair for Extensions
Before installing extensions, your natural hair should be clean. Not only will extensions attach better to clean hair, but they'll also last longer. Below, we'll get into the specifics, helping you get your natural hair set and ready for your extensions.
Shampoo Your Natural Hair
Begin preparing your natural hair by shampooing it. The aim is to remove dirt and oil from your scalp and strands. Do the following to get a gentle but effective shampoo session:
- Soak the Hair - Before adding any hair care products, drench the hair with running water. This will aid in shampoo distribution.
- Add Shampoo - Using your preferred shampoo (a sulfate-free one is most gentle), take a medium-sized dollop and start working it into your roots. Add more product if needed until you have your whole scalp covered.
- Massage, massage, massage - Using the pads of your fingers, work the shampoo into your scalp thoroughly.
- Distribute Shampoo Through - With the scalp covered, use your hands to start moving the shampoo through to the ends to clean your entire head of hair.
- Rinse - Rinse out all of the shampoo. Ensure there are no suds left, and all shampoo is washed out of hair before moving on the conditioner.
If you don't have a sulfate-free shampoo at home, try The Honest Company Perfectly Gentle Sweet Orange Vanilla Shampoo. It has no sulfates, comes in a delicious scent, and can also be used as a body wash.
For more details, read this article to learn how to wash human weave before and after the installation process.
Condition Your Natural Hair
With your hair freshly shampooed, it's time to add conditioner. Focus on the ends, as they are the oldest, driest parts of your hair.
Using your favorite conditioner, add a dollop to your hands and begin working it through your hair. Ensure that all of the ends are covered before moving the conditioner through the rest of the hair.
While your hair is coated in the slippery conditioner, use a wide-toothed comb or your fingers to detangle your hair.
Carol's Daughter Hair Milk is a deeply nourishing conditioner for curly girls.
Pro Tip: For super moisturized curls, apply a deep conditioner, put on a shower cap, and let your hair sit for 15 - 30 minutes before rinsing.
Moisturize Your Natural Hair
When moisturizing your curly hair, cream moisturizers and oils like argan and almond work wonders. Take the following steps to moisturize your hair adequately:
- Separate your hair into sections, and two-strand twist each section down to the ends. Four or more sections should be sufficient.
- Take down the first section, apply a bit of oil or your favorite moisturizing cream from roots to ends and work it in well. You can use a comb to distribute the product.
- Repeat the previous two steps for all of your sections of hair.
If you need a great conditioner, we recommend TGIN Butter Cream Moisturizer. It's full of hydrating and moisture-sealing ingredients like shea butter and coconut oil.
Stretch Your Hair (Optional)
Stretching is an optional step in the process of adding
Some methods of adding
Banding
Banding is a very effective hair stretching method that requires no heat and works on both wet and dry hair. To stretch curly hair using banding, you'll need to:
- Section your hair into four or more sections.
- Brush out each section with a Denman brush to smooth out and elongate the hair.
- Secure each section at the root with a hair tie, making a ponytail. Ensure that you don't make the ponytail too tight.
- Pull the hair taut and add hair ties down the hair shaft until there's no more room for additional ponytails.
Pro Tip: To get your hair super stretched, brush your hair out before adding each ponytail holder.
Blow Drying
Blow drying your hair is a useful stretching method; however, it requires heat. To stretch hair with a blow dryer, you need to:
- Section your hair into four or more sections.
- Turn the blow dryer on - use its lowest heat setting to minimize heat damage.
- Starting with whichever section you want, pull the section taut with your hand. This will ensure that the hair is elongated.
- Move the blow dryer from the roots to the ends in a vertical motion.
Pro Tip: If you want to maximize the stretch, you can brush through your hair with the Denman brush as you blow-dry.
Braiding
Another heatless way to stretch hair is the braiding method. For this stretching method, follow these steps:
- Separate your hair into four or more sections.
- Working one section at a time, brush the strands of the section to elongate the hair.
- Start braiding from the roots down to the tips.
- Repeat the previous two steps for all sections.
- Allow the braids to air dry, remove the braids, and then comb through your hair with a wide-toothed comb.
Install Your Extensions
Now that your hair is adequately prepped, it’s time to install your extensions. In the following sections, we will share with you exactly how to install clip-in, sew-in, crochet, and glue-in extensions.
Tip for all human
Install Clip-in Extensions
If clips-ins are your chosen method, then continue reading for some step-by-step instructions:
- Part your hair in several sections, each of which will eventually become cornrows.
- Do several straight back braids and leave some hair out in the front to cover up the extension wefts. Ensure that the braids are not too flat to the scalp, as this will make it difficult to clamp the clip-in extensions down.
- Begin attaching the clip-in extensions horizontally, starting at the nape of your neck and gradually moving towards the front of your head.
- Style the natural hair section that you left out. If your clip-ins are straight, you may want to straighten the section to blend it with the extensions. You can also use rollers to curl your hair and blend it with curly extensions. Clean up the hair around your hairline by adding a styling gel or mousse and smoothing it down with a toothbrush.
- Shape up your style. Use hair scissors to shape up your hair if necessary.
Watch the video above for a visual demonstration on how to install clip-in extensions.
Install Sew-In Extensions
Sew-in extensions require a considerable amount of time, as you'll need to create small braids around your head before sewing the extensions onto the braids. Follow the below steps for installation:
- Separate a large U-shaped section at the very top of your head and secure it away from the rest of the hair. You'll leave this section out and style it last.
- Part out half-inch sections of hair, starting immediately below the U-shaped section, and create cornrows. The braid parts should follow a U shape and go all the way down to the nape of your neck. NOTE: This is not the only braid pattern that you can do. Read this article to learn about several braid patterns you can use for a sew-in.
- Grab your thread and needle. Loop the thread into the eye of the needle, unwind some thread, and cut. Here's a video demo of how to thread a needle. How to thread a needle for a weave
- Place the
hair extensions against your braids and start sewing them onto the braids using the needle and thread. Take your time to avoid injury and knot the thread every so often as you sew. - Take down the top section and style as desired, using a bit of styling gel, a flat iron, or rollers as needed.
Install Glue-In Extensions
Glue-in extensions are much easier to do than sew-in extensions. Follow the below steps and tips to do glue-in extensions:
- Make a horizontal part across the head, starting at the nape of your neck.
- Measure your extensions to make sure they go across your head, stopping before your hairline so you can hide the tracks. You may need to cut some wefts down to the appropriate size.
- Add a little glue to the track and, starting from one end, slowly press the track into your hair, leaving a bit of room for growth.
- Press down on the tracks to make sure they're secure.
- Once pressed down and secure, repeat steps 1- 4 all over your head.
- Style your leave-out section. You can use a styling mousse, gel, rollers, or other styling tools and techniques to create the look you want.
Install Crochet Extensions
Crochet braids require you to crochet extensions with a latch hook, but it's nothing too complicated. Follow the below steps to install crochet extensions:
- Section your hair and create small cornrows all around your head. Think about what side you'd like to wear your part on, whether you want to leave some of your natural hair out, etc. The most basic way to part your hair is to make several braids going straight to the back.
- Oil the scalp between each braid to keep it moisturized.
- Grab a piece of the extension hair and fold it in half.
- Stick the latch hook under one of the braids and attach the middle of the extension hair onto it.
- Pull the latch hook back through the braid. When you've pulled the extension hair about halfway through, release the loop from the latch hook, pull the ends of the extension hair through the loop, and pull to tighten.
- Repeat steps 4-6 all over the head, leaving about a finger-width space between each piece of extension hair.
- Once you've achieved the fullness you desire, it's time to clean up your edges with gel. If you left any of your natural hair out, style it however you’d like.
- Cut off any excess extension hair to create the shape you want.
Pros and Cons of Extensions
Before you make your decision on whether to do
Pros
- Extensions add volume and length to the hair, increasing your style possibilities.
- They are long-lasting. Most
hair extensions last several weeks or months. - There are many hair extension options available, which allow you to match your hair color and texture perfectly.
- With proper installation, you can minimize the amount of damage caused by extensions.
Cons
- Depending on your braiding skills and parting system, there's a chance that your extensions may show.
- Some extension methods have the potential to be damaging to your hair.
Dos and Don'ts of Extensions
Once you decide that extensions are for you, take a look at this list of dos and don'ts to avoid potentially costly mistakes. We are all about preventing hair disasters, which is why we'd like to share them with you.
Do
- Be patient. It could take several hours to complete a full head of extensions.
- Carefully prep your hair before installing your extensions.
- Choose the highest quality
hair extensions . Human hair beats out synthetic hair every time. - After installation, regularly brush your hair to keep it from matting and tangling.
- Use a heat protectant before applying any heat to your hair.
Don't
- Use too much heat when styling your leave out. If you do, you could end up with heat damage. One pass with the flat iron should be enough for each section.
- Go to sleep with hair wet, as you could wake up to a tangly mess.
- Braid your hair too tightly, as this can pull out your hair and increase your risk of tension alopecia.
How to Install Curly Hair Clip-ins
How to Install Clip Ins on Short Natural Hair
Related Article: How To Choose Hair Extensions for Short Hair To Add Volume
An Overview of Hair Extensions
Hair weave, which can be made with human hair or artificial hair, is integrated with your natural hair.
All of this can be done without the potential damage that can come from coloring your hair or using harsh chemicals, like hair relaxers (i.e., creamy crack).
Where Do Hair Extensions Come From?
Most human
However,
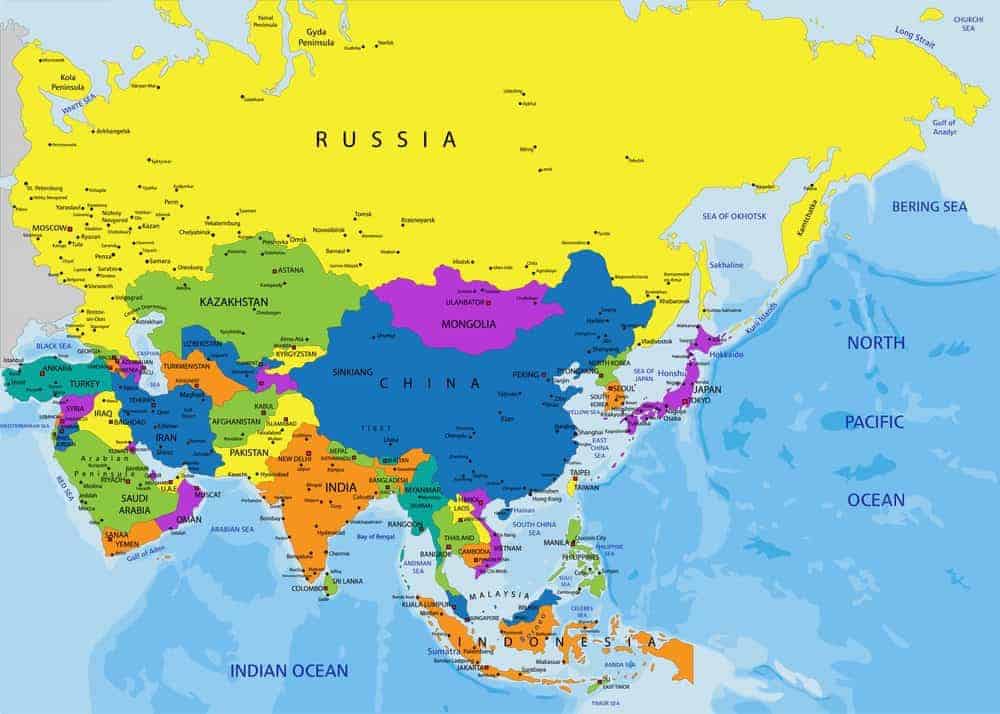
It's also important to note that Peruvian hair (i.e., Republic of Peru, South America) and Malaysian hair (i.e., Southeast Asia) are becoming quite popular in the United States.
It's important to point out that hair loss can occur from wearing certain hairstyles for a prolonged period of time, including weaves, especially when they put stress on your edges. This type of hair loss is commonly referred to as traction alopecia.
Who Invented Hair Weave?
The natural hair community has benefited greatly from the innovative minds of many African American women. Madame C.J. Walker is one of many names, but it is Christina M. Jenkins that created the process of hair weaving.
Christina Mae Thomas (maiden name) was born on Christmas, December 25th, 1920. She was born in Louisiana; but, not much is known about her early life.
She graduated from Leland College in 1943, earning a degree in science. Jenkins began work for a Chicago wig manufacturer.
In 1949, Jenkins started working on creating a secure fitting wig. After moving to Malvern, Ohio, she started studying how to add more body and length to a person's natural hair.
On May 4, 1951, Jenkins filed for a patent for a technique she called "Hair Weev," which permanently attached commercial hair to live hair. The United States Patent Office granted patent US2621663 on Dec 16, 1952.
Jenkins was the owner and operator of Christina's Hair Weev, located in the Shaker Heights neighborhood in Cleveland up until 1993.
She also frequently taught her hair weaving techniques as the visited various hair shows throughout Europe.
Jenkins also married Herman "Duke" Jenkins, a jazz pianist. Together, the two of them raised a daughter, Shelia Jenkins-Cochran.
As usual, some people dispute whether Christina invented the hair weave. The naysayers argue that similar techniques were used in ancient Egyptian times.
How to Tell If Your Extensions Are Good Quality
The Best Human Hair Weave Bundles
If you're looking for the best human hair weave bundles, you’ll want to consider a few important factors. First and foremost, does the manufacturer use high-quality hair?
Is it definitely “100% human hair” or is it “artificial” hair?
When you're comparing the different types of
Curl Centric recommends Beautier Straight Brazilian Hair (straight hair), ALI JULIA Curly Hair (curly hair) and Sunber Brazilian Ombre Hair (ombre hair). This is high-quality hair from some of the best-rated brands. To install these sewn-in or braided extensions, your natural hair is braided or cornrowed, and the extensions are then sewn into the braids.
Although no glue or heat is applied to the hair, sew-in extensions can damage your natural hair. Over time, tight braids that hold the extensions can cause hair loss.
Excessively tight braids can also cause headaches, although traction alopecia (i.e., hair loss) should be your primary concern.
The hair will also need to be washed regularly to prevent the formation of bacteria in the braids. Some people say this type of application can be uncomfortable for the first few days following the application.
You’ll also want to consider how well the hair holds up to styling. Often, that will depend on if you're using virgin
Just like your natural hair, the more often you apply heat and color to your hair, the harder it is to manage, so buying
Indian Hair Extensions

One of the most common types of hair used for
Indian hair is similar to European hair, as it relates to the texture and thickness of the hair strands.
Indian hair is very easy to style and blends well with other hair types, including many African American hair types. Indian hair is usually silky feeling, bouncy, and relatively lightweight.
In many cases, wholesale Indian Remy hair is fairly inexpensive, although some of the best Indian hair brands can be quite expensive.
It's not uncommon for celebrities to spend thousands of dollars on the best hair extension brands and installation methods.
You must properly maintain your
Related Article: Are Hair Extensions Haram?
Chinese Hair Extensions

Chinese hair is another hair type that is often used for extensions. This type of hair has a thicker follicle than most European hair and has hardly any curl.
The natural color for Chinese hair is dark brown or black. For other colors, the hair must be bleached and then dyed. As long as the bleaching and dyeing processes are done correctly, it will not affect the hair extension's overall quality.
Chinese hair is suitable for most women. This type of hair is sleek and very manageable. It generally does not look frizzy or become wavy in high humidity.
European Hair Extensions

In Europe, very few women sell their hair. This creates a certain amount of scarcity for European hair.
From a supply and demand standpoint, the limited supply and high demand of European hair bundles result in higher prices relative to other hair types.
European hair is usually light brown or various shades of blond. These light hair colors mean that the hair does not need to be processed as much, resulting in stronger, healthier
Related Article: How To Choose the Best Hair Extensions for Thin Hair
When Do We Recommend Wearing Hair Extensions ?
Wearing extensions as a temporary style can help protect your hair for a period of time while you transition.
Here are some potential scenarios to consider:
When you go natural, you may decide to big chop. If you're uncomfortable with the way your hair looks after big chopping,
Of course, you could also wear a wig, crochet braids, faux locs, or other hairstyles. Although, working on the mental transition associated with going natural is also an important component.
Often new naturals become frustrated with their hair for a period of time. If this happens to you, wearing
We generally don't recommend extensions for more than a couple of months.
Ultimately if you wear
Why?
In our experience, the longer you wear extensions, it's more likely that you'll eventually neglect to care for your natural hair.
Learning how to care for your natural hair, especially when you first go natural, is so important.
If you ever want to wear your own hair, we highly recommend that you start experimenting with your hair immediately. You need to understand what your hair likes and dislikes.
What are Remy Hair Extensions (aka Remy Human Hair)?
Remy Hair ensures that the root end of the hair is facing one direction and the tip of the hair is facing another direction. This helps to ensure that the hair extension maintains its cuticle direction and natural texture.
There is some light chemical processing done to Remy Hair, although as long as the cuticle remains intact during the manufacturing process, the hair will not easily tangle.
When the cuticle is intact, the hair will follow in the same direction. If the hair's cuticle is damaged, the hair will appear lifeless, dull, and will tangle more easily.
Some companies soak the cuticle in a large acid bath. Once the cuticle is removed, the hair is covered with silicone to make it more difficult for the consumer to determine if the hair extension is made with 100% real Remy Human Hair.
Once the extension is washed a few times, the silicone is washed out. This will cause the hair extension to feel rough.
Other companies use 10 to 40 percent non-Remy hair yet still sell it as Remy Hair. So be sure to conduct some due diligence prior to purchasing
Longqi
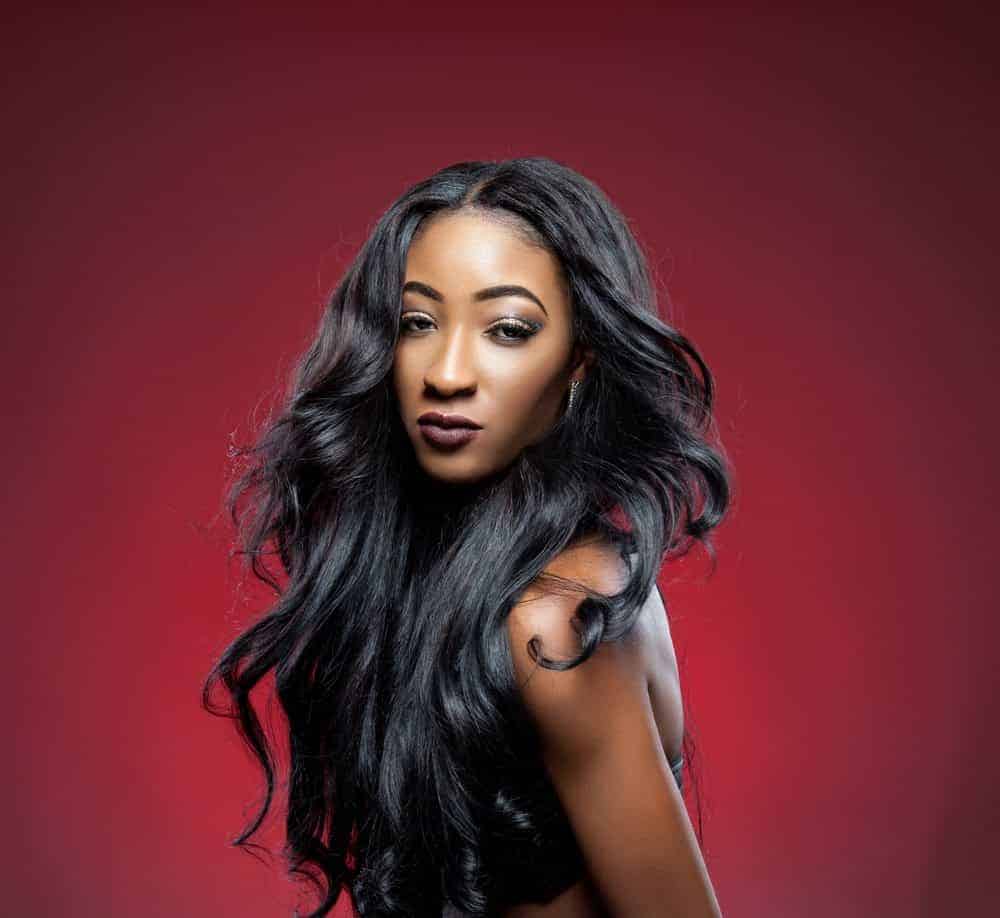
The company advertises that their human hair weave bundles are 100% unprocessed Brazilian human hair and assures that it will withstand various hair treatments, including color and perming.
The bundles come in a wide variety of lengths, currently from 8 inches all the way to 30 inches.
You will receive multiple wefts per bundle, but there aren't many length combinations. There are various colors to choose from, including dark brown, medium brown, and natural black.
Based on the color varieties offered, I wonder if the wefts are actually unprocessed. The red and medium brown colors appear to be professionally dyed.
Longqi is often praised for fast delivery, good packaging and price to value ratio.
Fani Beauty Grade Virgin Hair
Fani Beauty offers
Cexxy Human
Cexxy hair is another popular hair extension brand. Their extensions are 100% Brazilian virgin human hair.
Cexxy claims that their donors’ hair is “washed twice with warm water and shampoo” and that their warehouse staff picks out any gray hairs before shipping. The company shows a lot of pride in the way they obtain and handle their hair bundles.
As you can see, you have many wonderful choices for human hair weave bundles from a wide variety of price points. All of these hair products are natural and unprocessed, allowing you to customize your color and texture.
Types of Hair Extensions Pros and Cons
Tape-in
Additionally, these extensions should be treated using special shampoos, conditioners, and styling products if you want to keep them in the best possible shape.
These extensions can easily be taken out using a glue remover or easily installed with glue, tape, and liquid adhesive.
Clip-on or Clip-in Extensions: Clip-in hair pieces, also referred to as clip-in
These extensions can be purchased for a range of prices, all depending upon the quality that is desired. Clip-ins will be more commonly sold as a long piece that can be cut into several layers to give a layered effect.
When you buy these extensions, they will usually come with their own clips sewn into the hair. However, sometimes the clips will need to be added.
After the clips are sewn into place, it is recommended to clip them into the hair or visit a hair salon and have a stylist create a nice and natural look.
Micro Rings: These are extensions that are sometimes called microbead or micro loop extensions. They use small beads or rings; generally, aluminum, lined up with silicone to help attach the hair extension.
They are fixed into small sections of your natural hair and then tightened by a special tool that will clamp the bead around your natural hair.
Microbeads are designed to be small enough so that they're visible when installed correctly. They will need to be repositioned as your natural hair is growing, as the beads will grow away from the scalp over time.
Seeing how they do not use adhesives or heat, these extensions should not cause as much damage as some of the other forms, as long as they are installed properly and maintained correctly.
There are a number of sizes that are available for the microbeads/rings, usually from 1.5mm to 5.5mm.
Sizing will make a difference in terms of the weight of the actual extension and the visibility and feel. Some microbeads are tiny enough that they almost mimic a non-surgical hair transplant.
Stylists who install these extensions should determine the sizing of the microbeads/rings that are going to be best for the length and texture of the client's hair before installation.
Netting: This is a technique that involves braiding natural hair underneath a thin, breathable net serving as a flat surface where the stylist can weave the extensions.
This method will require the use of a cap or hair net placed over the person's head before braiding the hair.
The netting will offer more flexibility than a track placement simply because the stylist will not be limited to only sewing the extensions onto the braid. There is also the option of gluing or sewing the wefts directly onto the net.
This technique is usually not as time-consuming when you look at others, as it only takes between two and four hours to complete in many cases.
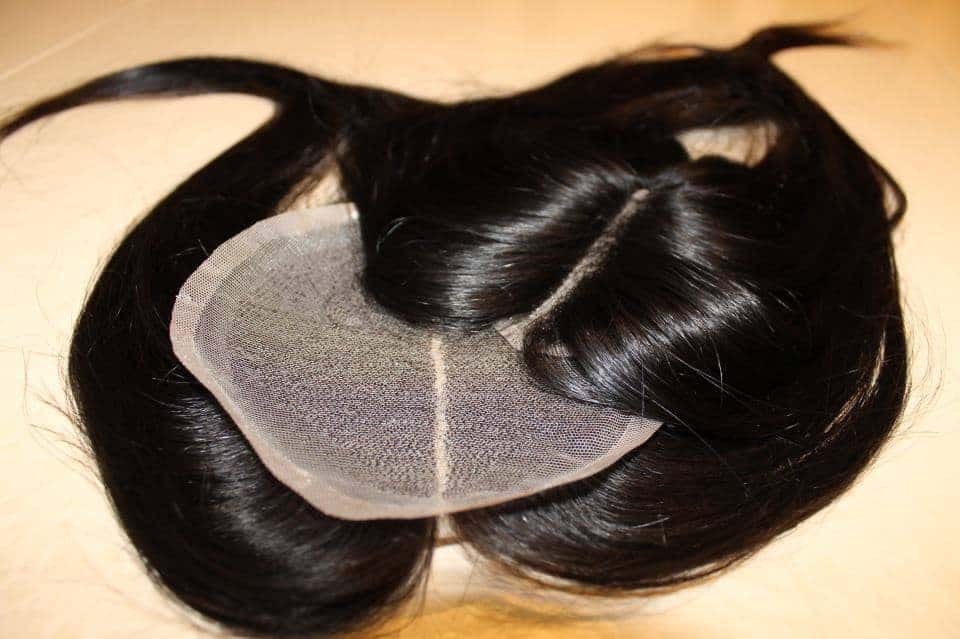
Lace Fronts: This is a recent development in
It will give the hair a more natural look and feel over a traditional extension, and it comes with a few variations, such as curly, straight or wavy hair types.
The extension units may either be weaved into the hair or attached to the hairline with special adhesives.
For a proper fit, it is best to have measurements taken of the head. Lace front wigs and extensions are best placed by a professional since advanced techniques are generally used.

Types of Weft Hair Extensions
The type of human hair that is currently the easiest to find is referred to as premium hair.
It can be found online and in beauty supply stores. Due to being reasonably priced and widely available, it's one of the most popular hair wefts.
Unfortunately, premium hair tends to tangle more, because it's not assembled with all the hair strands oriented in the same direction.
When the cuticles of the hair shaft are allowed to run in opposite directions, they catch on each other, causing the hairs to cling together and get tangled, which makes the hair look worse and shortens the lifespan of the hair wefts.
Premium hair is available in two varieties:
Regular premium hair: This type of hair is usually the least expensive type of human hair, in which the cuticles run in different directions, potentially making the hair cling together and tangle.
Tangle-free premium hair: the hair is chemically treated in an acid bath to remove the hair cuticles, reducing the friction of the hair, and then the hair is treated with a laminate to restore the “healthy hair shine” that is lost during the acid bath.
Synthetic Hair Extensions
Synthetic hair is made of different types of synthetic fibers instead of using human hair. It comes in two forms: weave (also known as weft) and single strands (often sold as bulk hair) to make braids.
Synthetic hair strands usually aren't as durable as human hair strands because they are prone to damage from heat and the friction of the hair rubbing against the body, and other daily wear and tear.
Some synthetic hair brands look unrealistic and stiff, while some more expensive synthetic hair brands appear more natural.
In most cases, you shouldn't use heat styling tools (e.g., curling iron, flat iron) on low-end, inexpensive synthetic hair fibers. Although it's worth noting, some high-end synthetic hair brands claim to be heat-friendly.
Some newer hair blends on the market blend high-quality synthetic hair with human hair, reduce the cost and provide a more natural look than synthetic hair alone.
Futura Hair
Futura fiber is a synthetic hair fiber that can be used with heat styling tools up to a temperature of 400 degrees F. If taken care of properly, Futura hair strands may outlast human hair.
Futura hair closely resembles human hair, with a natural-looking shine, and can be straightened or curled.
It does take more time to set, and Futura fibers can’t be dyed like real human hair. Also, Futura is sometimes found blended with human hair.
The Properties of Human Hair
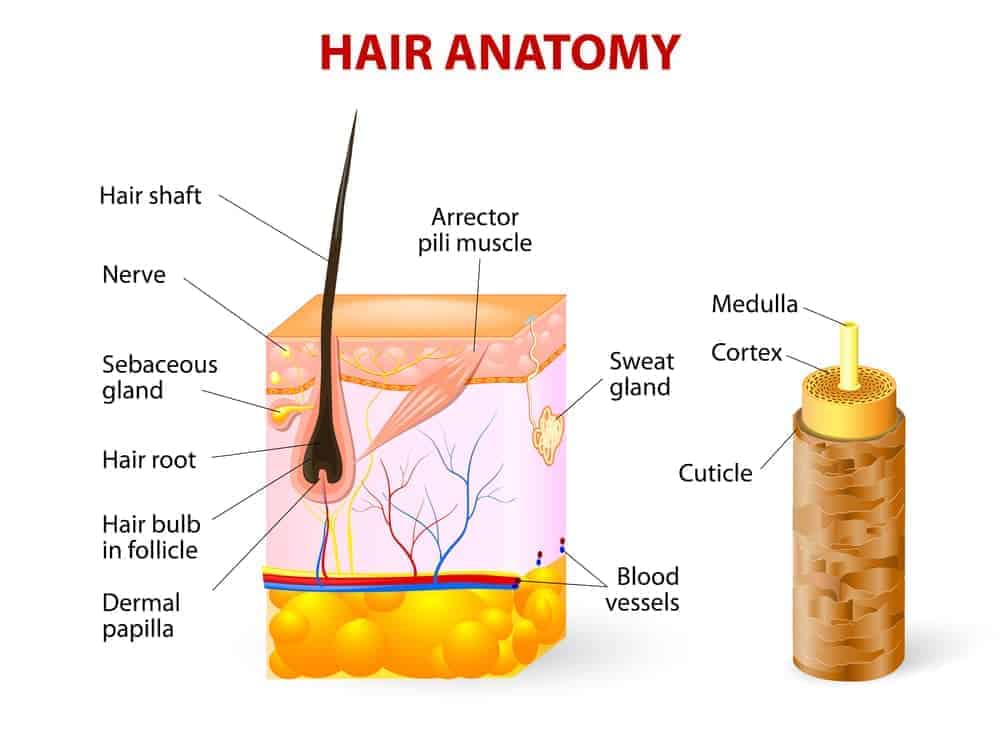
Human hair consists of three layers of a hard, dead protein called keratin. The hair’s inner layer is called the medulla, which gives the hair its elasticity.
The middle layer, the cortex, gives the hair its color, texture, and strength and makes up the bulk of the hair shaft. The outer, transparent layer of the hair is the cuticle.
The cuticle is made up of small layers of cells that overlap like shingles, which protect the hair shaft.
To get the very best human hair in the industry, you must purchase hair from “hair collectors” who take the hair directly from a person’s head, then immediately bundle it into a ponytail so that the hairs never get separated or turned around.
This type of hair is often called virgin cuticle hair. Virgin cuticle hair will last the longest, be more durable, and be easier to use and maintain because the cuticles have not been broken, stripped, or altered.
To maintain the quality of virgin cuticle hair, the hair must be kept together and sewn on a track in the same direction as it was collected, without any processing, chemical treatments, or steaming of the hair.
Familiarizing yourself with the types of hair available for
Integration Methods
The misnomer of using the word 'tracks' comes from the conventional method of integrating wefts called the 'track and sew' method. Usually, the 'tracks' are cornrows, which are braided in whatever direction the hair falls.
Next, the wefts get sewn onto the braids. Normally a blunt-ended specially made needle is used. The needle may be either straight or curved.
Many different specially-made colors of thread are available, depending on what color the hair is that you are integrating.
A darker thread is used with darker hair. Another important thing to note is that whenever the hair gets braided with a high tension level (overly tight), the client is at risk of developing traction alopecia.
A special bonding glue can be used to bond wefts directly to the client's hair.
Care needs to be taken so that the hair weft is not bonded to the scalp directly since, in some customers, that may cause sensitivities. Frequently a patch test is recommended.
Many different methods can also be used for bonding bulk hair to the hair. These methods range from adhesive to clips.
Debunking Common Hair Extensions Myths
Myth 1: Hair Extensions Are Very Expensive
Although some celebrities spend thousands of dollars having
Myth 2: Hair Extensions Cause Hair Damage
When
However, if the extensions are installed in a way that puts stress on your edges,
Myth 3: People Will Be Able to Tell I Am Wearing Extensions
hair extensions that have the cuticle intact (i.e., 100% Remy Hair) and they're installed correctly.
Myth 4: When You Wear Extensions, Your Hair Stops Growing
Hair extensions can help encourage length retention, which means you'll actually enjoy longer hair growth if your hair is properly maintained.
This is because you're presumably manipulating your natural hair much less while wearing extensions, which should lead to less breakage from this protective style.
Myth 5: I Cannot Use Hair Extensions Because I Have an Active Lifestyle
Hair extensions can be easily managed, even for someone who leads an active way of life; however, it may require a slight adjustment to your routine.
For example, for the first day or two after an application is completed, you should not wet your hair or sweat excessively to ensure the bond adheres properly.
Once you have taken a break for a couple of days, you can resume your normal activities, including swimming, yoga, and cardio workouts.
Natural Hair Weave Companies
The list below details the top natural hair weave companies that provide sew-in extensions, hair weave closures, clip-in wefts, and wigs.
Heat Free Hair
Heat Free Hair was created to provide women with natural hair or those considering going natural with high-quality clip-in extensions, wigs, closures, and weft hair for protective styling.
This hair blends naturally with most hair textures ranging from 3B hair types, elongated s-curls, to 4C hair types, which are tightly coiled kinky curls.
Haute Kinky Hair: Hair Extensions and Clip-in Hair Extensions
Many hair extension and weave product lines are either too curly or too straight. The hair doesn't resemble the kinky, curly texture of many African American women with natural hair.
Consequently, many women were unable to find natural hair weaves that matched their naturally textured hair.
Most of the available hair weave and extension product lines didn't resemble their natural hair.
Haute Kinky Hair sourced hair that resembled 3B to 4C hair texture. After plenty of research and testing, Haute Kinky Hair provided women with a believable premium virgin kinky hair that resembles 3B to 4C hair types.
Curlkalon Hair: Pre-Curled Textured Hair
Curlkalon offers 100% pre-curled synthetic hair for women who want a cost-effective, low-maintenance alternative to human hair.
With Curlkalon, women can have effortless, bouncy, beautiful hair at an affordable price.
Bella Kurls: Clip-in Curly Hair Extensions
Bella Kurls offers 100% Mongolian, Brazilian, and Malaysian clip-in
This premium quality hair comes in various textures, including curly, wavy, and kinky hair types. This provides women with many options based on their hair textures.
Some Final Advice on Buying Hair Extensions
 Clip-In or Flip-in
 Hair Extensions are Good for Beginners
If this is your first time using
This way, you'll start to get a good feel for the extra hair and figure out what style you want without having to commit to something more permanent.
Related Articles:
- How Do Hair Extensions Work
- How Long Do Hair Extensions Last
- Wavy Weave Hairstyles for Black Hair
- Weaves vs. Wigs
Conduct Due Diligence Before You Buy
We recommend doing your own research to figure out what really suits your personal taste. You can take recommendations from your stylist, but you don't need to rely on them entirely. Network a bit and consider the input of everyone you know that wears a weave.
Purchase 100% Remy Human Hair Extensions
100% Remy Human Hair is generally the most desirable since some hair extension manufacturers rely on misleading marketing tactics that may trick some customers.
It's important to note that the cuticle will still be intact on the best
How Do You Match Hair Extensions
It's best to use natural light when matching
When Do We Recommend Wearing Hair Extensions ?
When you are transitioning to natural hair or after you've big chopped, you may want to change up your look. This is an excellent time to consider wearing
When Do Extensions Become Problematic?
Hair extensions should be used for short time periods. If you wear them for extended periods of time, they can negatively impact your hair goals. Why?
When wearing
We believe
Installing Hair Extensions is Quite an Undertaking
When deciding to add
We hope that this article is helpful to you in your styling endeavors.

 Clip-In or Flip-in


