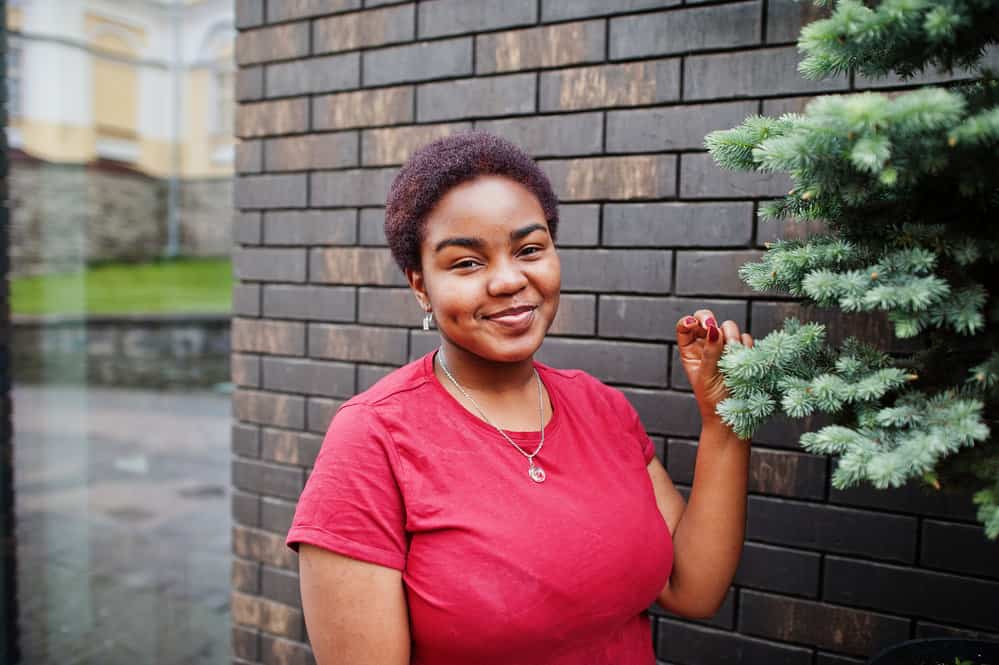
Are you tired of feeling stuck in a hairstyle rut with your short 4C hair? If you answered yes, it's time to break free from the monotony and embrace your creativity with some fresh and exciting new styles!
So in this article, we’ll highlight some of the best hairstyles for short 4C hair across the entire Natural Hair Community.
We’ll show you how to revamp your hair game and transform those short locks into a variety of stunning styles. Now that we’ve gotten the introduction out of the way, let’s jump right in!
Table of Contents
- 1 15 Short Natural Hairstyles for 4C Hair
- 2 1. Finger Coils
- 3 2. Mini Bantu Knots
- 4 3. Fauxhawk
- 5 4. Mini Afro Puffs
- 6 5. Twist-Out
- 7 6. Box Braids
- 8 7. Finger Waves
- 9 8. Cornrows
- 10 9. Wash and Go
- 11 10. Tapered Cut
- 12 11. Feathery Pixie Cut
- 13 12. Rubber Band Braid Half Updo
- 14 13. TWA
- 15 14. Flat Twists
- 16 15. Mini Twists
15 Short Natural Hairstyles for 4C Hair

This article will showcase 15 short natural hairstyles perfect for ladies with 4C hair types. 4C hair is known for its tightly coiled texture, and it’s also incredibly versatile.
Whether you’re looking for a low-maintenance cut or something requiring more styling, we’ve got you covered.
We include curly crochet braids with synthetic hair, passion twist crochet braids, and so much more. So, let’s dive in and discover some new short hairstyles that will enhance your natural beauty!
1. Finger Coils
One of the defining features of 4C hair is its lack of a consistent curl pattern. Fortunately, there are a few different techniques you can use to transform your natural kinks into adorable, perfectly defined curls.
One of the best ways to do this is by finger-coiling your hair.
To give it a try, apply a curl-enhancing mousse or gel to damp, freshly washed hair. Apply a little more product to your hands and twirl a small section of hair around your finger until you can wrap it any further.
Hold the curl for a few seconds before carefully releasing it and repeating the steps on the next section. Continue finger-coiling your hair until you’re left with a head full of tight curls.
As a final step, mist a lightweight holding spray onto your hair.
That will help lock out frizz and ensure that your coils stay perfectly defined. Need more assistance? This video tutorial will turn you into a finger-coiling pro!
2. Mini Bantu Knots
Bantu knots are achieved by twisting hair into small knots and securing them close to the scalp. And while Bantu knots make a fantastic hairstyle on their own, they also do a great job of styling your hair.
When you take out your knots, your natural kinks will be transformed into a head full of soft, perfectly defined curls. Are you ready to try this two-in-one lookout for yourself?
To start, wash and detangle your hair like normal. While your hair is still damp, apply your favorite curl-defining product and make sure it’s evenly distributed.
Part your hair into small sections, and twist each into a tiny bun.
Secure each Bantu knot with a bobby pin or small elastic band, and repeat the process until your entire head is covered with mini Bantu knots.
Have fun rocking your knots for a day or two before unraveling them and revealing your new, ultra-defined curls. Here’s a video demo that breaks things down a little further.
3. Fauxhawk
If you’re a fan of edgy hairstyles, you're probably familiar with mohawks. The iconic cut has become a fashion staple due in large part to its drastic shape and profile. But we get it. Mohawks aren’t for the faint of heart.
The good news is that mohawks have a softer, much more wearable alternative called a fauxhawk. Both fauxhawks and mohawks have short sides and a significantly longer middle.
But while a traditional mohawk has shaved sides, a fauxhawk features sleek, slicked-back sides. To get the look, simply part your hair into three horizontal sections.
Smooth a little gel onto your sides, and gather each section into a sleek ponytail.
Take your time and ensure that all the ponytails are lined up in the center of your head. Once you finish installing your hair, carefully break apart the extensions and fluff them up. For more styling tips, take a look at this helpful tutorial.
4. Mini Afro Puffs
Do you know what’s better than one ponytail? How about half a dozen or so of them? These mini afro puffs are achieved by pulling your hair into a dozen or so ponytails, allowing the hair to fan out.
Since you can always add more ponytails as needed, you won’t have to worry about your hair being too short. To get the look, part your hair into multiple sections, and gather each one into a ponytail.
Regular ponytail holders may be too bulky for your short strands, so secure them with a small rubber band instead. Once you run out of sections, gently fluff up the afro puffs with your fingers.
As a finishing touch, apply a pea-sized amount of gel to your edges and swoop them with a toothbrush. Need a bit more help? Just check out this convenient video tutorial.
5. Twist-Out
If you have 4C hair, you likely already know about shrinkage. Shrinkage is when your curls bring your hair upwards and make your hair look much shorter than it actually is in reality.
So if you want to show off your length, you’ll have to stretch out your natural curl pattern. One of the best ways to do that is with a twist out.
Twist outs are a popular style for natural hair, in which your hair is twisted and then unraveled to create defined curls. Start your twist-out by thoroughly shampooing and conditioning your hair.
Next, apply a generous amount of curl-enhancing mousse, gel, or cream to your hair. While your hair is still damp, part your hair into multiple sections and twist each one from root to end.
Keep in mind that the smaller you make your twists, the tighter and more defined your curls will turn out. Wait until your hair is 100% dry before unraveling your twists. Then, just fluff up your curls and enjoy!
Watch this video demo for all of your other questions and concerns.

6. Box Braids
Having short hair doesn’t mean that you’ll never get to play around with longer locks. Box braids are a classic style that you can do on short 4C hair with or without extensions.
In addition to looking chic and luxurious, box braids are highly protective! The extensions create a barrier between your natural hair and the elements.
Since you can wear your box braids for up to six weeks, your strands will get a break from the stress of daily brushing, combing, and manipulation.
To create box braids, part your freshly washed and dried hair into box-shaped sections. Next, take a small portion of braiding hair, and loop it around the base of one section.
Gather your hair and the extensions into a braid, and plait them from root to end.
Keep making your way through the rest of your sections until you’ve finished installing your braids. Watch how this talented creator transforms her short 4C coils into long, stunning box braids.
7. Finger Waves
If you’ve seen the classic cartoon Betty Boop, you’re already familiar with our next look. Finger waves are a retro hairstyle that has been popular since the 1920s.
They are created by molding the hair into S-shaped waves for an incredibly sculpted and romantic look. Finger waves add a vintage charm to your hair and are surprisingly easy to recreate!
To begin, you'll apply a generous amount of strong hold mousse or gel to damp hair. Use a fine tooth comb to sculpt deep waves along the hairline and throughout the rest of your hair.
Allow your hair to dry completely before gently brushing out the waves with a soft, boar bristle brush.
Once you’re satisfied with the style, lock it in place with a light mist of holding spray. Need a little more help getting started? Watch this video demo to learn how you can recreate these darling finger waves.

8. Cornrows
Cornrows are one of the most widely worn hairstyles for natural 4C hair due to their ease, versatility, and ability to protect your strands. Cornrows are a type of braid that is woven tight against your scalp.
To create them, you or a stylist will part your freshly washed and dried hair into multiple rows. How you do your rows are completely up to you!
You can keep them straight for a neat and tidy look or have fun experimenting with different shapes and angles. Once you’ve planned out and parted your rows, cornrow each one from start to finish.
Although cornrows should never be painful, your hair and scalp may feel tight when you first finish them.
If that’s the case, feel free to apply a little mousse or braiding spray to your finished hairdo. Getting your cornrows just right can be tricky, so here’s a beginner-friendly tutorial to help.
9. Wash and Go
When it comes to styling your hair, it literally doesn’t get any easier than a wash-and-go. As you may be able to tell from the name, a wash-and-go is a low-maintenance hairstyle achieved by washing your hair and letting it air dry without manipulation.
The key to achieving a great wash-and-go is ensuring that your hair is well-moisturized. So after shampooing and conditioning your hair, apply a generous amount of curl-defining cream, gel, or mousse to your damp strands.
After that, the only thing left to do is dry your hair.
The high-velocity air from a blow dryer can disrupt your curl pattern, so opt for a more gentle method like air drying or using a diffuser.
Wash and go’s are quick, undemanding, and easy on your strands. And as a result, they’re the perfect choice for people with busy schedules.
They also do an excellent job of highlighting your natural textures and showing off the beauty in your curls. This tutorial will explain everything else you’ll need to know.

10. Tapered Cut
Regardless of how great your hairstyle is, your look will only be as good as your cut. In fact, even making minor changes to your hair’s shape can dramatically elevate your hairdo. One of the best examples of transformative haircuts is a tapered fade.
They pair a longer, more voluminous top with a much shorter back and sides. Tapers create a clean, precise shape that gives the cut a touch of elegance and edge.
To create a taper, use a pair of clippers to cut the back and sides of your hair slightly shorter than the top. Then, gradually get shorter as you make your way down your head.
Whether you prefer to wear your hair sleek and polished or messy and textured, a tapered cut creates the perfect base for a number of different hairstyles. Are you thinking about giving this look a try? Make sure you check out this video demo first.
11. Feathery Pixie Cut
Having natural hair doesn’t mean that you’ll never get to play around with straighter styles. In fact, straightening your hair can make it look longer and ensure that all those inches are fully displayed.
A feathery pixie cut is a playful and flirty cut characterized by short, wispy layers.
Despite being one of the shorter haircuts, pixies give your hair a ton of movement and volume. And as a result, they’re a pretty much universally flattering ‘do!
Still not sure if you can pull it off? In addition to being adorable and versatile, a feathery pixie cut is the ultimate low-maintenance hairstyle.
Simply smooth a little mousse or gel onto freshly washed hair, and sit under a hooded dryer until your hair dries. You can either end there or use a small flat iron to lift and define your layers. This tutorial is perfect for beginners, so make sure you check it out.

12. Rubber Band Braid Half Updo
Our next look is so adorable you’ll want to try it out right away! Rubber band braids are a type of style that uses small rubber bands to gather your hair together.
They’re easier and faster to install than traditional braids but somehow manage to look just as cute. To start your rubber band braids, use a comb to part your hair from ear to ear. Take the front section, and divide your hair into small, equal-sized boxes.
Starting with the front row, secure the base of each section with a small elastic band.
Next, line up each section with one of the ones behind it to create an X, and join them together with another rubber band. When you finish your rubberband braids, apply a curl-enhancing cream to your loose curls.
Keep in mind that there’s a ton of room to customize your braids.
Use rubber bands close to your natural hair color for a more natural and subtle look. But if you’re after a more fun and vibrant look, use brightly colored rubber bands just like this gifted creator did.
13. TWA
A TWA, which stands for teeny weeny afro, is another simple and classic option for short natural hair. It’s essentially your natural hair but taken to the next level.
If you want to pull off a TWA, get your hair trimmed, so it's roughly the same length around your head. For a tighter and more structured look, try bringing in your back and sides slightly to give it more shape.
Once you get your basic silhouette, part your TWA on either side and apply your favorite gel or cream to your strands. Then, just brush the hair in your preferred direction.
TWA’s are one of the easiest hairstyles to pull off, which gives you plenty of time to focus on your hair’s health. So make sure you’re getting regular trims and using plenty of hydrating conditioners and moisturizers to take care of your strands.
You can watch this helpful video demo for more haircare and styling inspiration.
14. Flat Twists
Do you like the look of cornrows but lack the braiding skills needed to pull them off? If the answer to that question is yes, you’ll love our next look.
Flat twists are created by taking two sections of hair and twisting them flat against your scalp. They have a similar shape as cornrows but take a fraction of the time to install!
You’ll start the flat twists like cornrows by parting your hair into multiple rows. Then, break each row into two parts and twist them around each other. Slowly incorporate fresh hair into the twist as you make your way down the row.
That will anchor it to your scalp, so your twists look nice and neat.
Repeat the process on each section until you’ve twisted all of your hair. And that’s it! Take a look at this tutorial for more information on how you can recreate these gorgeous flat twists.
15. Mini Twists
Our final look proves that hairstyles don’t have to be complicated to look great. Mini twists are a two-strand twist style that’s comprised of small twists all over your head.
It’s an ultra-defined and textured style that lasts for an impressive two to six weeks. And since there’s no braiding involved, it's incredibly beginner friendly!
Just part your hair into multiple sections, and twist each one from root to end.
And that’s all there is to it! Tired of rocking your twists? Like Bantu knots, mini twists are a two-in-one hairstyle.
So once your hair has had enough time to dry completely, you can carefully untwist it to reveal soft waves! Here’s a short video showing you how to pull off this adorable look.
To sum up, hairstyles for short 4C hair can be just as trendy and versatile as any other hair type. Just make sure you treat your hair gently and avoid over-manipulating it.
You’ll also need to use plenty of hydrating, strengthening, and nourishing products. And once you find the right products and master your technique, you’ll love the vast array of stunning hairstyles you can create!
So don’t be afraid to experiment with your 4C locks to unlock their full potential. That said, we hope that the hairstyles we’ve gone over today have helped provide some inspiration!


